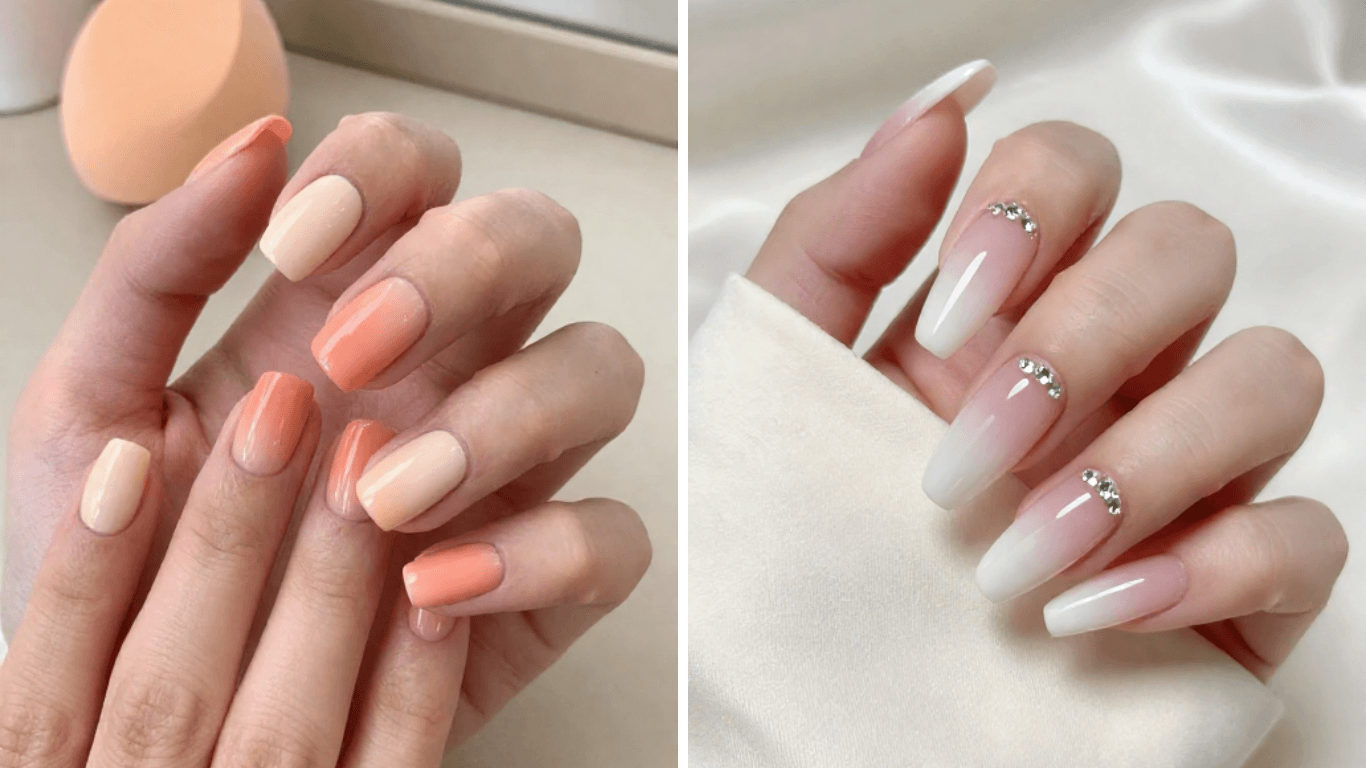
Ombre nails are all about a smooth color change. One shade slowly fades into another instead of stopping at a sharp line. That simple change can give you many different looks, from soft baby boomer nails to shiny chrome fades.
The tricky part is knowing what to ask for at the salon. A sponge fade, baby boomer, and aura ombre are made in different ways and can look completely different on the finished nail.
Below, you’ll find 16 ombre nail ideas grouped by technique and finish. Some are soft enough for everyday wear, while others add glitter, chrome, or small details. There are also options for short nails and longer shapes.
What Are Ombre Nails?
Ombre nails use two or more colors that gradually blend into each other. You should not see a hard line where one shade ends and the next one begins.
The fade can move from the cuticle toward the tip, across the nail from side to side, or in the opposite direction. The word “ombre” comes from French and means shaded.
The easiest version is often a light base with a second color softly faded over the tip. If you want something simple for work, two shades that are close in color can give you a clean and subtle result.
How to Do Ombre Nails
You can create a basic ombre at home with a makeup sponge and a little patience.
- Apply your light base color over the whole nail and let it dry.
- Put the two polish colors next to each other on a makeup sponge.
- Press the sponge gently onto the nail, moving it slightly where the colors meet.
- Add another thin layer if the color needs more depth.
- Clean any polish from the skin around your nail.
- Finish with a glossy top coat.
Thin layers usually give you a smoother fade than trying to get the whole effect in one pass.
Core Ombre Techniques
1. Baby Boomer
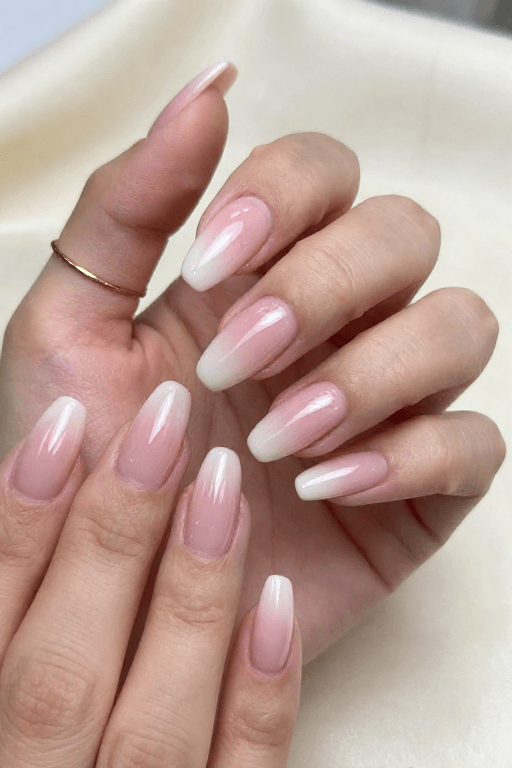
Baby boomer nails are a softer take on the classic French manicure. A pale pink or nude base slowly fades into milky white at the tip.
The colors stay close together, which gives the nails a clean and natural finish. This is a good choice if you want something polished for work, weddings, or everyday wear without a strong contrast.
Best for:
Work, everyday wear, and anyone who wants a clean, natural finish.
Longer nails can make the fade more noticeable, but it also works well on short and medium nails.
2. Classic Two Tone Fade
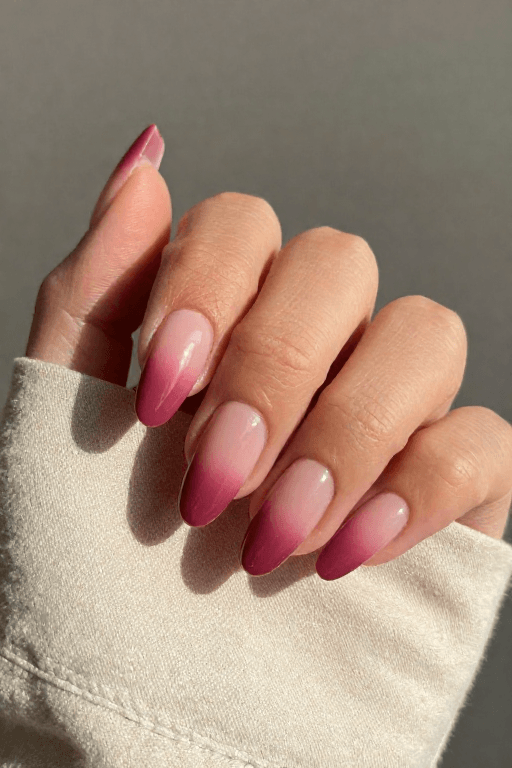
This is the basic ombre look. One color starts around the cuticle, while the second shade becomes stronger toward the tip.
You can use almost any color pair. Pink and white give a soft finish, while two deeper shades create something more noticeable.
Good Choice If:
You want a simple ombre without extra glitter or nail art.
3. Reverse Ombre
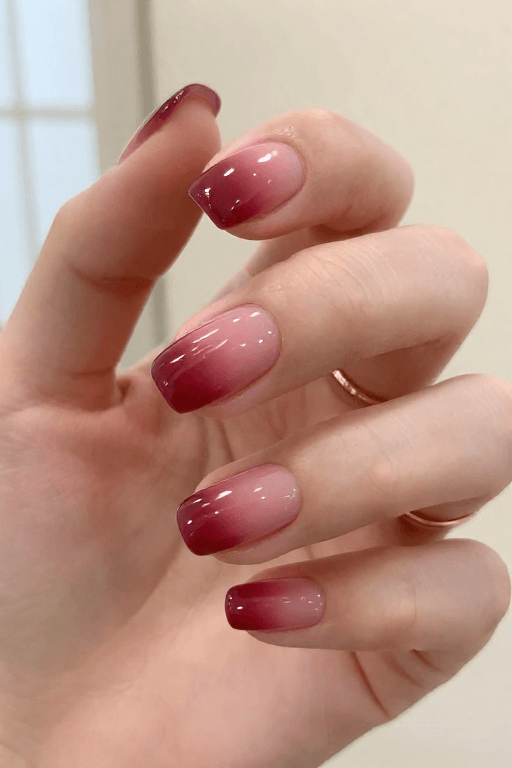
Reverse ombre changes the usual direction. Instead of the darker color sitting at the tip, it begins around the cuticle and fades into a lighter shade.
It can be a nice option for short nails because the darker area gives the nail some definition without covering the whole surface.
Try This:
Start with the darker color near the base of the nail and carefully blend it upward. A second thin layer can add more color without making the fade look too thick.
4. Vertical Ombre
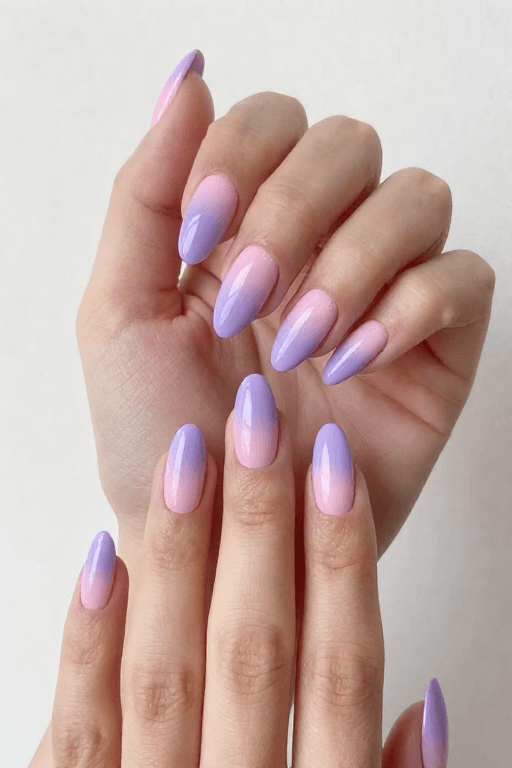
Most ombre designs fade from the cuticle to the tip, but this one moves from side to side.
One side of the nail starts with one shade, and the color gradually changes as it reaches the other side. It gives the nails a different look without adding extra nail art.
Good Choice If:
You want something a little more noticeable but do not want rhinestones or detailed designs.
You can use the same direction on every nail, or change the direction on alternate nails for a more playful look.
Soft and Dreamy Fades
5. Sponge Ombre
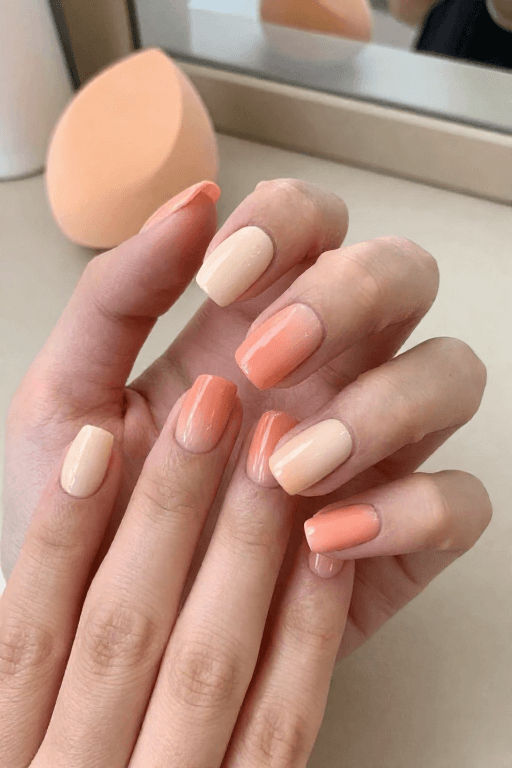
A makeup sponge is one of the easiest ways to create an ombre at home. It gives the colors a soft edge and helps them meet without a sharp line.
The finish can look a little textured before the top coat, so do not worry if it does not look perfect after the first layer.
Try This:
Tap the sponge rather than dragging it across the nail. Use a clean part of the sponge as you move from nail to nail so the colors do not become muddy.
6. Airbrush Style Fade
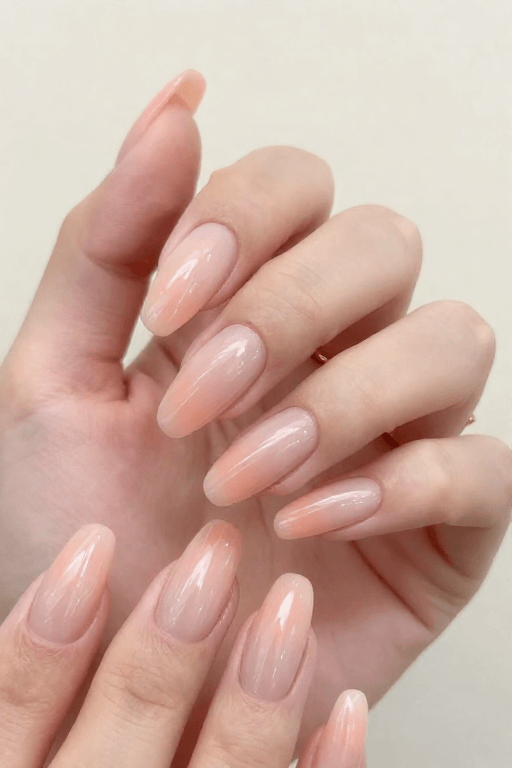
Airbrush ombre has an especially smooth finish. The color looks almost misted onto the nail, with no obvious dots or rough edges.
This is usually easier to get from a nail tech who has an airbrush tool. If you are doing it yourself, very thin layers and a fine sponge can create a similar soft effect.
Good Choice For:
Nude, pink, peach, and other light shades when you want the fade to look almost weightless.
7. Aura Fade
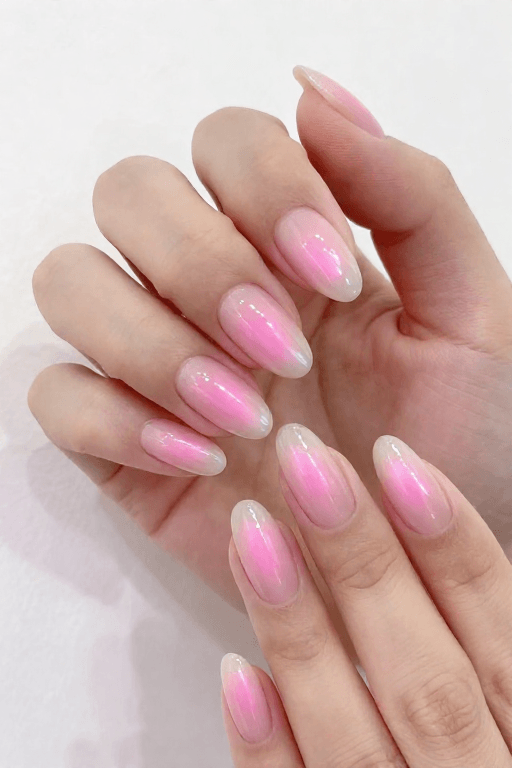
Aura nails place the strongest color somewhere in the middle of the nail, then soften it as the shade moves outward.
The result looks a little like a glow. You can use pink, purple, blue, peach, or almost any color you like over a sheer or light base.
Best for:
Anyone who likes a soft design but wants something more interesting than a basic tip fade.
Start with a little bit of color. Add more gradually. That way, the outer edge stays soft and blurry.
8. Cloud Ombre
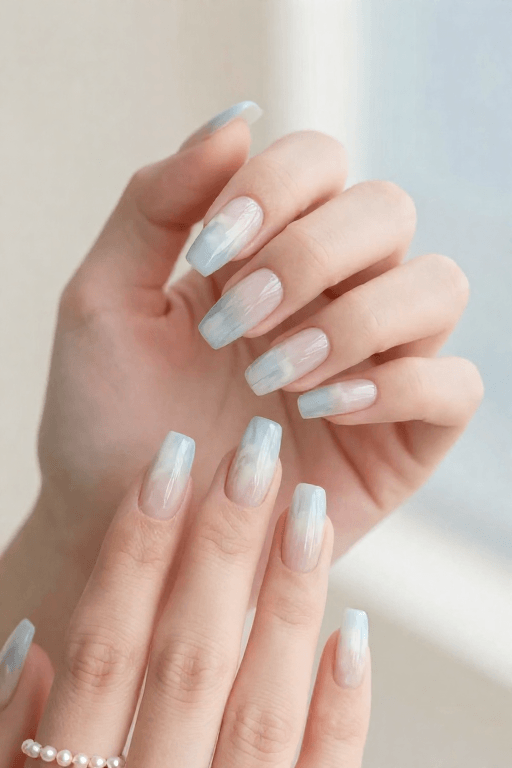
Cloud ombre feels soft and airy. When you mix pale polish on a light base, the hue of Cloud Ombre looks almost fluffy instead of sharply painted.
It is a pretty choice for spring, weddings, or anyone who prefers very light nail designs.
Keep It Soft:
The trick is not to overload the nail with white. A few thin layers usually look better than one thick coat, especially when you want the base to stay slightly sheer.
Ombre With Texture and Finish
9. Glitter Fade
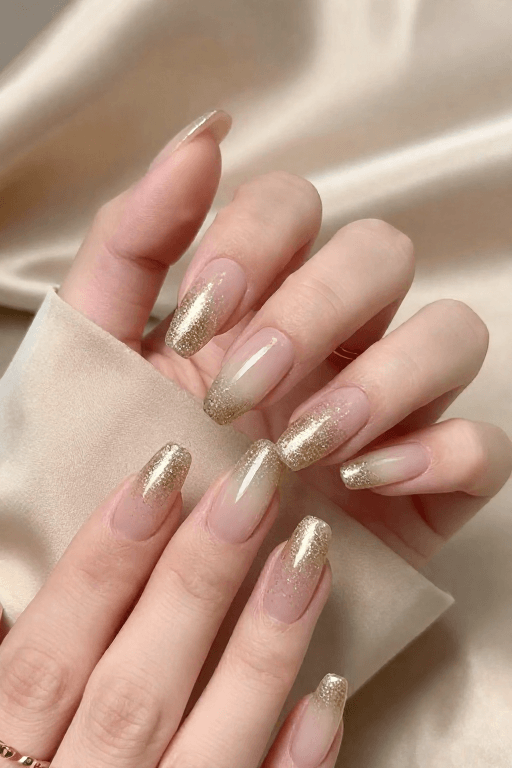
Glitter ombre puts most of the sparkle toward the tip and lets it fade as it moves toward the cuticle.
It works well when you want something festive without covering the whole nail in glitter. Fine glitter gives the softest result, while larger pieces make the design more noticeable.
For Gel Nails:
Press the glitter onto the tacky layer and concentrate more of it near the tip. A good top coat will smooth the surface and help keep the glitter in place.
10. Chrome Ombre
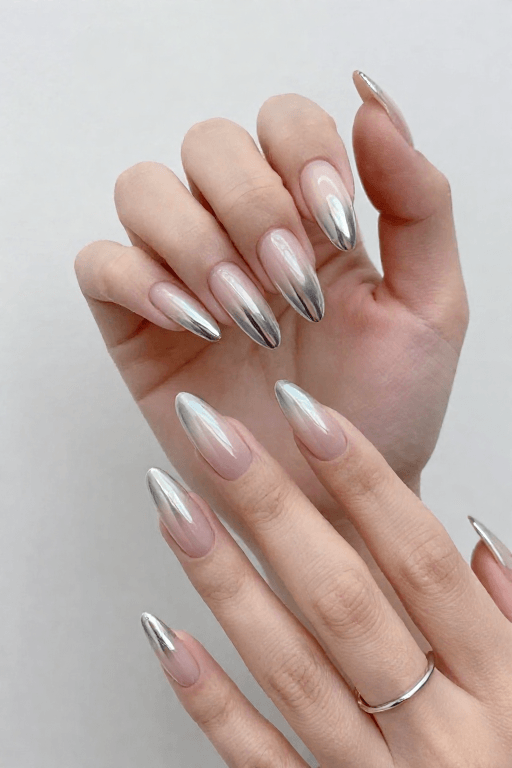
Chrome powder can completely change the look of an ombre manicure. Once it is rubbed over the finished fade, the surface gets a reflective shine that makes the colors appear brighter.
Soft pink, nude, white, and pale beige are easy bases for this style because the chrome becomes the main feature.
Good Choice If:
You want more shine from your ombre. Chrome is usually easier to apply with gel products and the right curing steps, so this can be a good one to leave to a nail tech if you are new to chrome powder.
11. Matte to Gloss Ombre
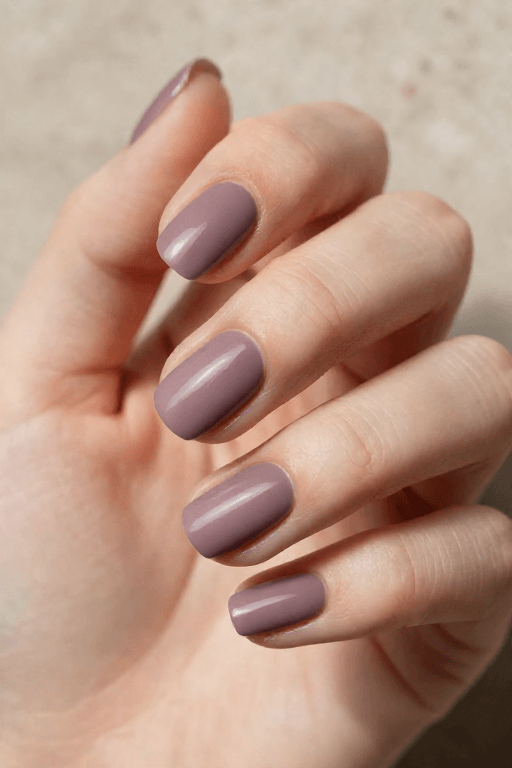
This ombre does not rely on two different colors. Instead, the change comes from the finish. The nail starts with a soft matte look and gradually becomes glossy toward the tip.
Because the color stays the same, the effect is quite subtle. You can notice it more when the light hits the shiny part of the nail. It is a nice choice if you like simple nail designs but still want something a little different.
Works Well On:
Short nails, since you do not need much space for the design.
Apply a matte top coat over the nail first, then add a glossy top coat over the tip area.
12. Sheer Ombre
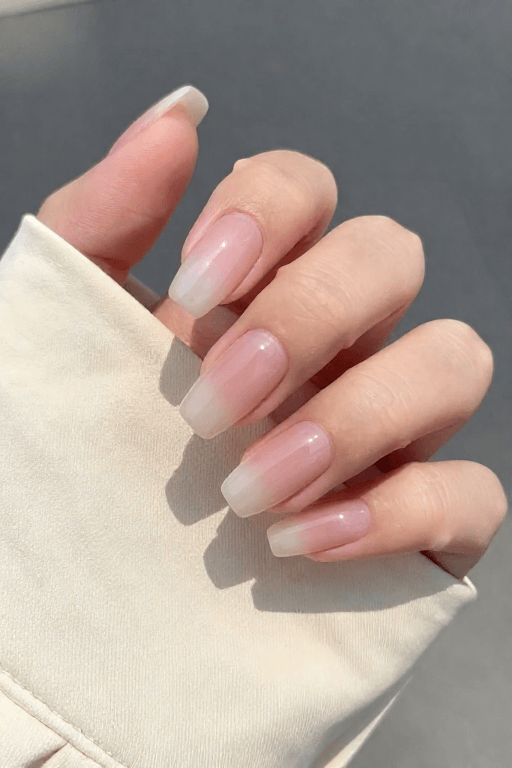
Sheer ombre keeps some of the natural nail visible underneath. The result is light, glossy, and easy to wear.
A soft pink, nude, milky white, or jelly color can work well here. Because there is no strong line near the cuticle, the manicure can also grow out more naturally.
Try This If:
You want the tip to have more depth while the area near the cuticle remains almost see-through.
Build the color slowly to keep the fade soft.
Ombre by Nail Shape and Detail
13. Short Nail Ombre
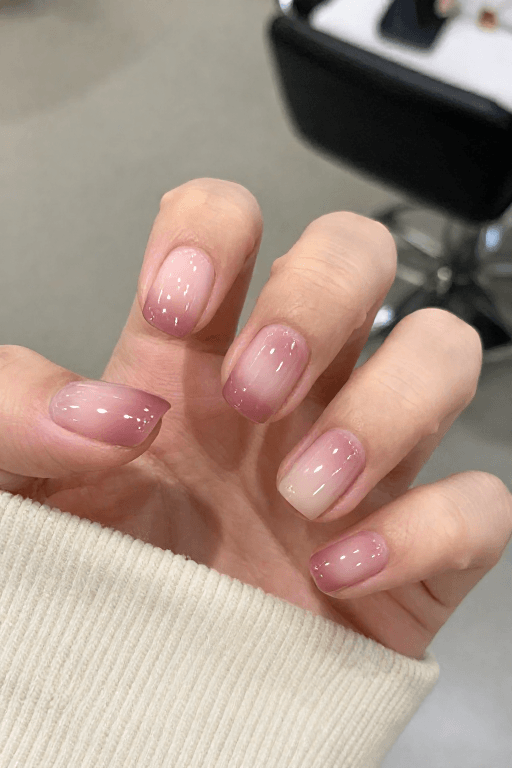
Ombre can look just as pretty on short nails as it does on longer ones. A soft, smaller fade often works better here because there is less space for the colors to blend.
Keep most of the deeper color near the tip and pick two shades that are fairly close to each other. The result feels clean and balanced instead of making the nails look too busy.
Works Well On:
Round and square nails.
If you want your nails to look a little longer, a soft fade over the top third can help draw the eye toward the tip.
14. Almond Ombre
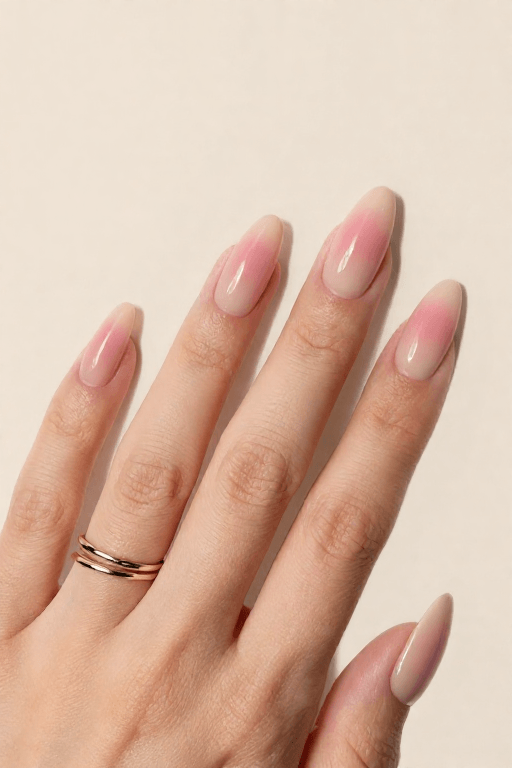
Almond nails give an ombre fade plenty of room to show. The long, curved shape naturally guides the eye from the base toward the pointed tip.
A medium-length almond nail is a good middle ground if you want the shape to be visible without going very long.
Good Choices:
Baby boomer, nude-to-pink, and chrome ombre all work well on this shape.
Browse our almond nail ideas for more inspiration.
15. Ombre With a Gold Line
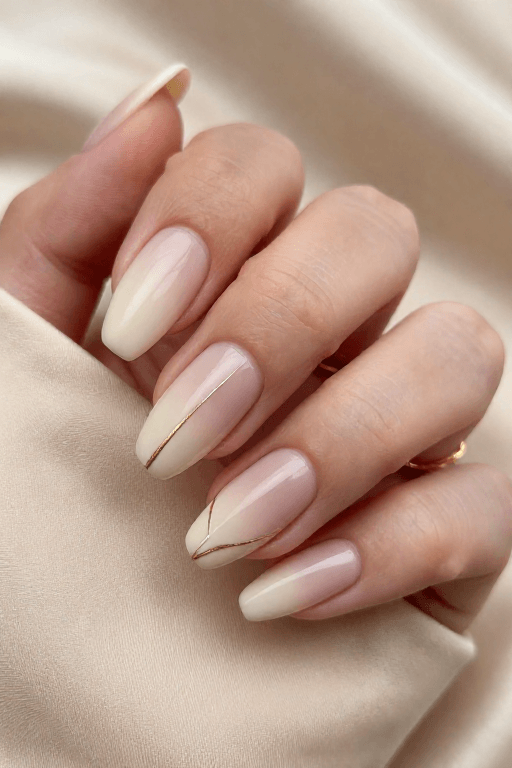
A thin gold line can be placed where the two ombre shades meet. It gives the fade a little more detail without covering up the blend.
This works nicely for weddings, parties, or when you want a simple manicure with one small fancy touch.
Keep It Thin:
Let the ombre dry first. Then use a striping brush to draw the line. Keep the line narrow, so it matches the fade rather than standing out as the main design.
16. Ombre With Rhinestones
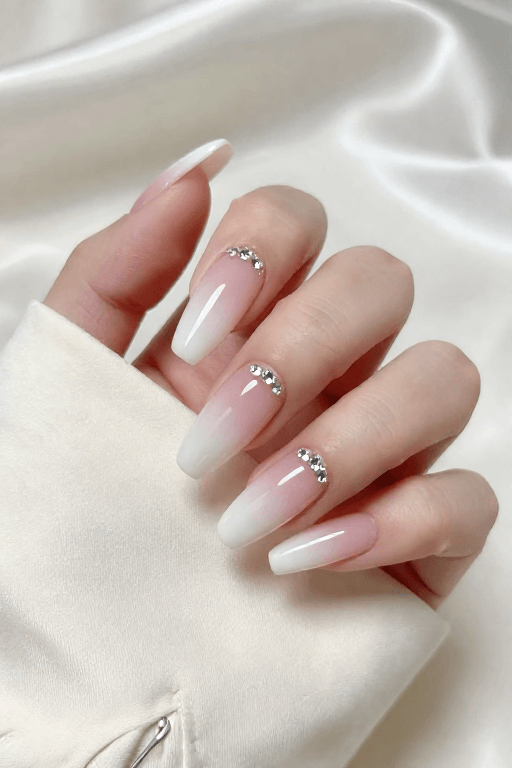
A few small rhinestones can dress up a simple ombre manicure without making it look too busy.
Try placing three or four stones near the cuticle or along one side of the fade. The placement can follow the shape of the color change and give the manicure a little sparkle.
Best for:
Longer nails, although a single small gem can also work on short nails.
Fewer stones usually keep the ombre looking clean.
Things to Know Before Trying Ombre
Ombre looks simple, but the colors and layers make a big difference.
What to Avoid
- Colors with a very large difference in depth can be harder to blend.
- Thick layers may make the fade look uneven.
- Too much polish on the sponge can leave a heavy finish.
- Skipping the top coat can make the colors look dull.
A Few Helpful Tips
Sheer and reverse ombre can be good choices if you want regrowth to be less noticeable.
If you are doing the manicure at home, a makeup sponge, thin brush, and some patience are enough for a basic fade.
If you are visiting a nail tech, save a photo of the exact ombre you like. This is often easier than trying to explain how soft or strong you want the fade to be.
Keep reading: 15 Modern French Tip Nail Ideas, Chrome Nail Ideas: What Chrome Powder Actually Does and 15 Almond Nail Ideas Worth Saving for Your Next Manicure. Not sure which shape suits your fade? Try our free nail shape quiz.
Frequently Asked Questions
Your next manicure, sorted
 Nail Art Designs30 Christmas Nail Ideas for Every Holiday Party
 Nail Colors/Trends17 Nude Color Nail Ideas to Try This Year
 Nail CareAcrylic Nail Ideas: What to Know Before You Get Them Done
 Nail Art Designs17 Black Nail Designs for Every Mood and Outfit
 Nail Colors/Trends12 Fall Nail Colors to Try for a Chic Autumn Look
 Nail Colors/Trends18 Pretty Blue Nail Ideas for Every Skin Tone
 Nail Colors/Trends15 Red Nail Ideas Worth Trying Right Now
 Nail Art Designs20 Cute Nail Ideas for Short and Long Nails
 HaircutsUltimate Guide to Pixie Cuts: 24 Ideas for Every Face Shape and Hair Type
 Occasion OutfitsWinter Wedding Guest Dresses: 20 Best Looks to Wear
- Free toolNail Size ChartMeasure once and get the right press-on size for every finger.Find my sizes
Final Thoughts
There is more than one way to wear ombre nails. A baby boomer or sheer fade can keep things simple, while glitter and chrome give the same basic idea a much brighter finish.
If you are new to ombre, start with two shades that are close in color. Once you know which type of fade you like, you can try different nail shapes, finishes, and small details. Save a few favorites to your Pinterest board and take the photo with you when you visit your nail tech.