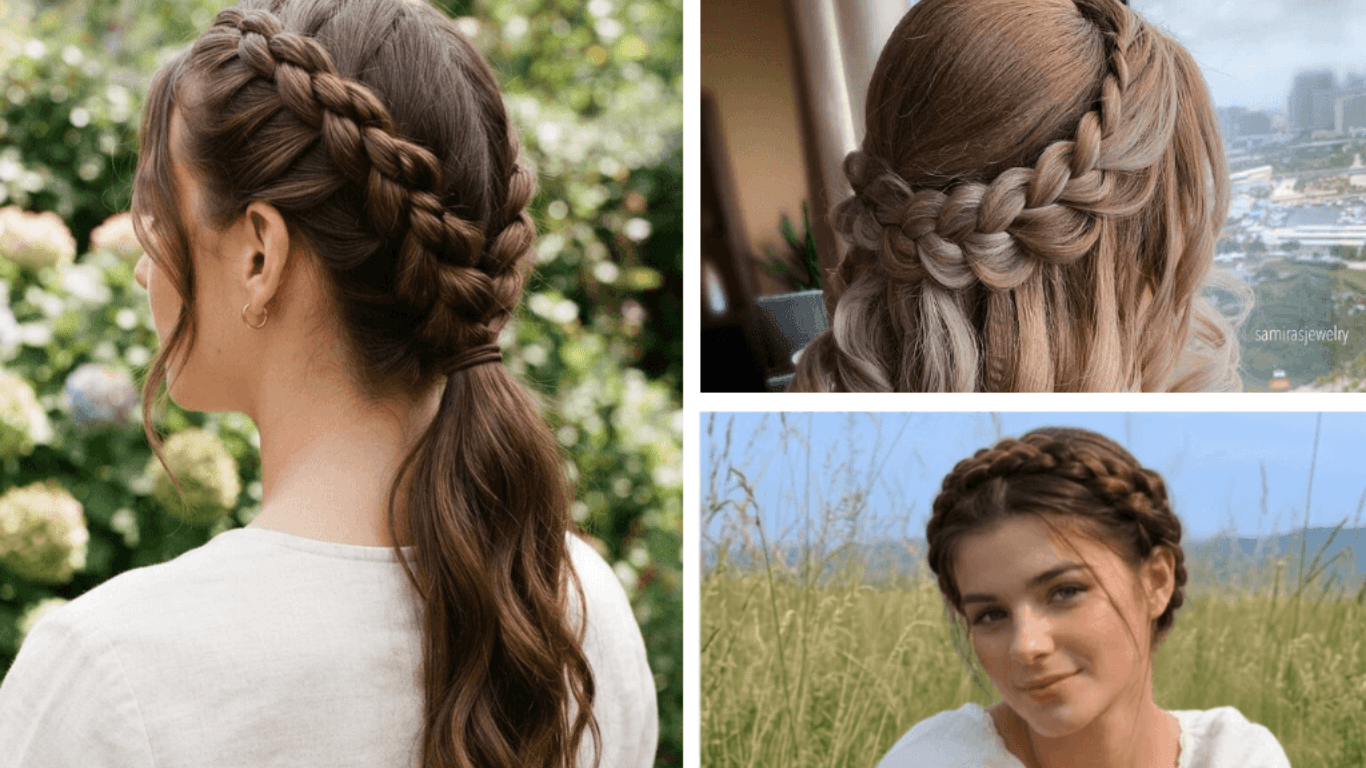
Braids are one of those hairstyles that never really go out of style. Some are quick enough for a busy morning, while others can last for weeks and completely change your look. From simple French braids and fishtails to knotless braids, cornrows, and more detailed protective styles, there is something for almost every hair type and occasion. Below is a list of 25 braided hairstyles that you should consider trying out in 2026.
Find your braid in 10 seconds
i Tap any category below to find your braid
1. Infinity Loop Braid
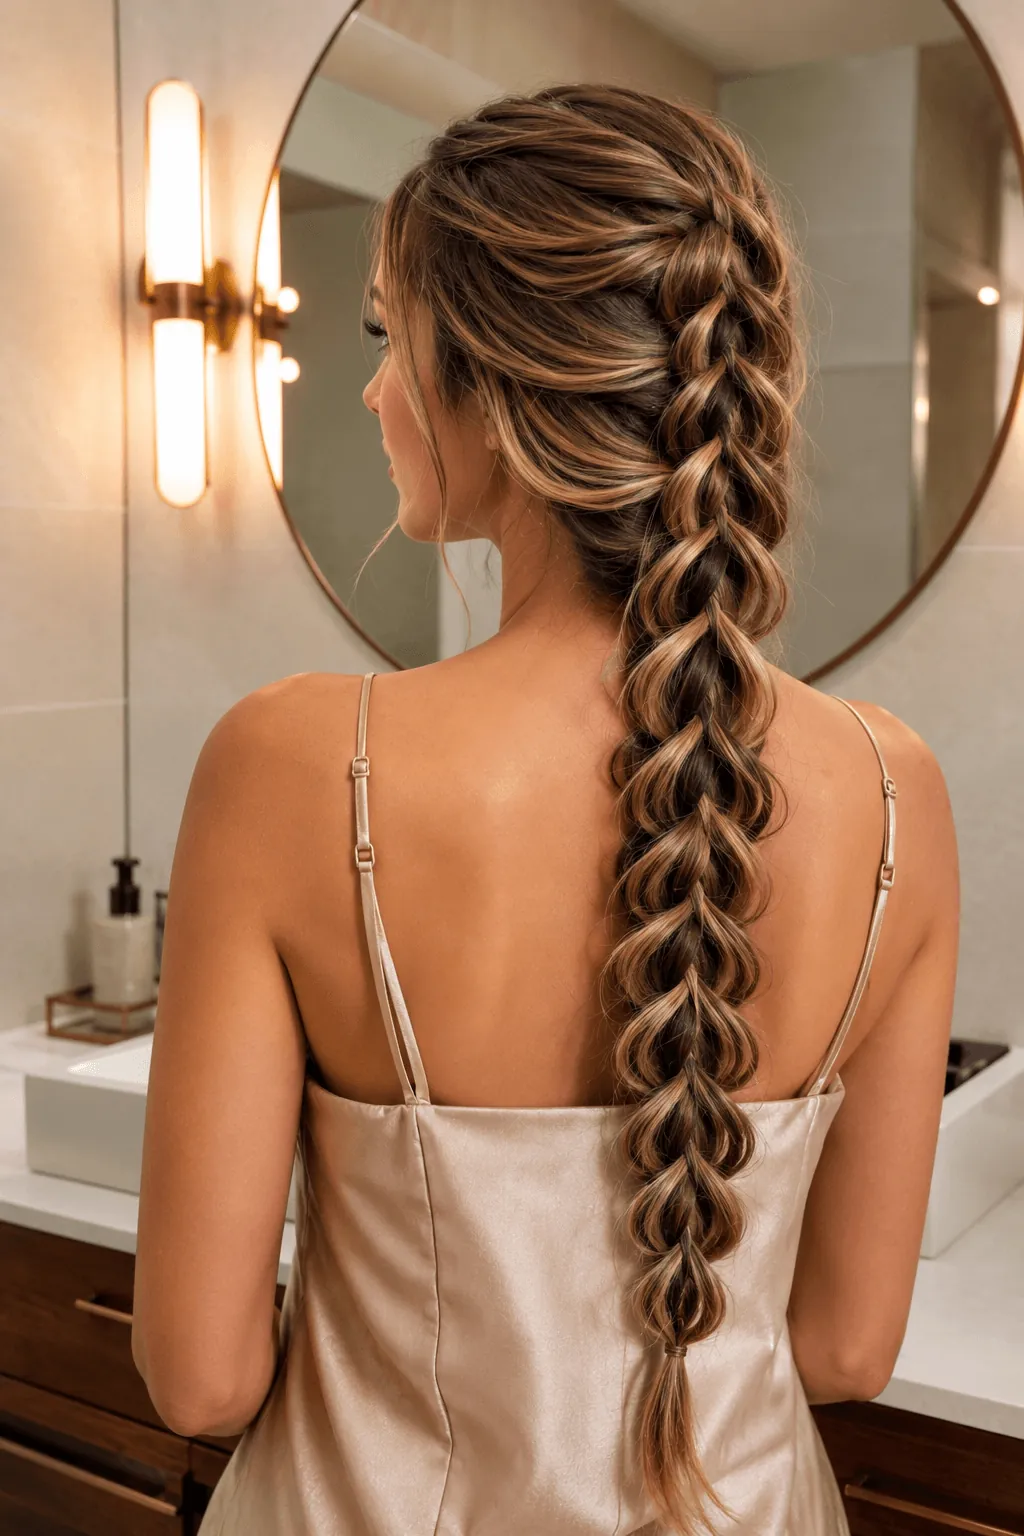
Small ponytails loop back through their own base, over and over down the head, creating a chain-like pattern that mimics a woven braid without any strands actually crossing. It’s less a braid and more a series of knots that happen to look like one.
Best For: Anyone who wants braid-like texture but struggles with the hand motion of a real plait.
2. Dutch Braid Pigtails
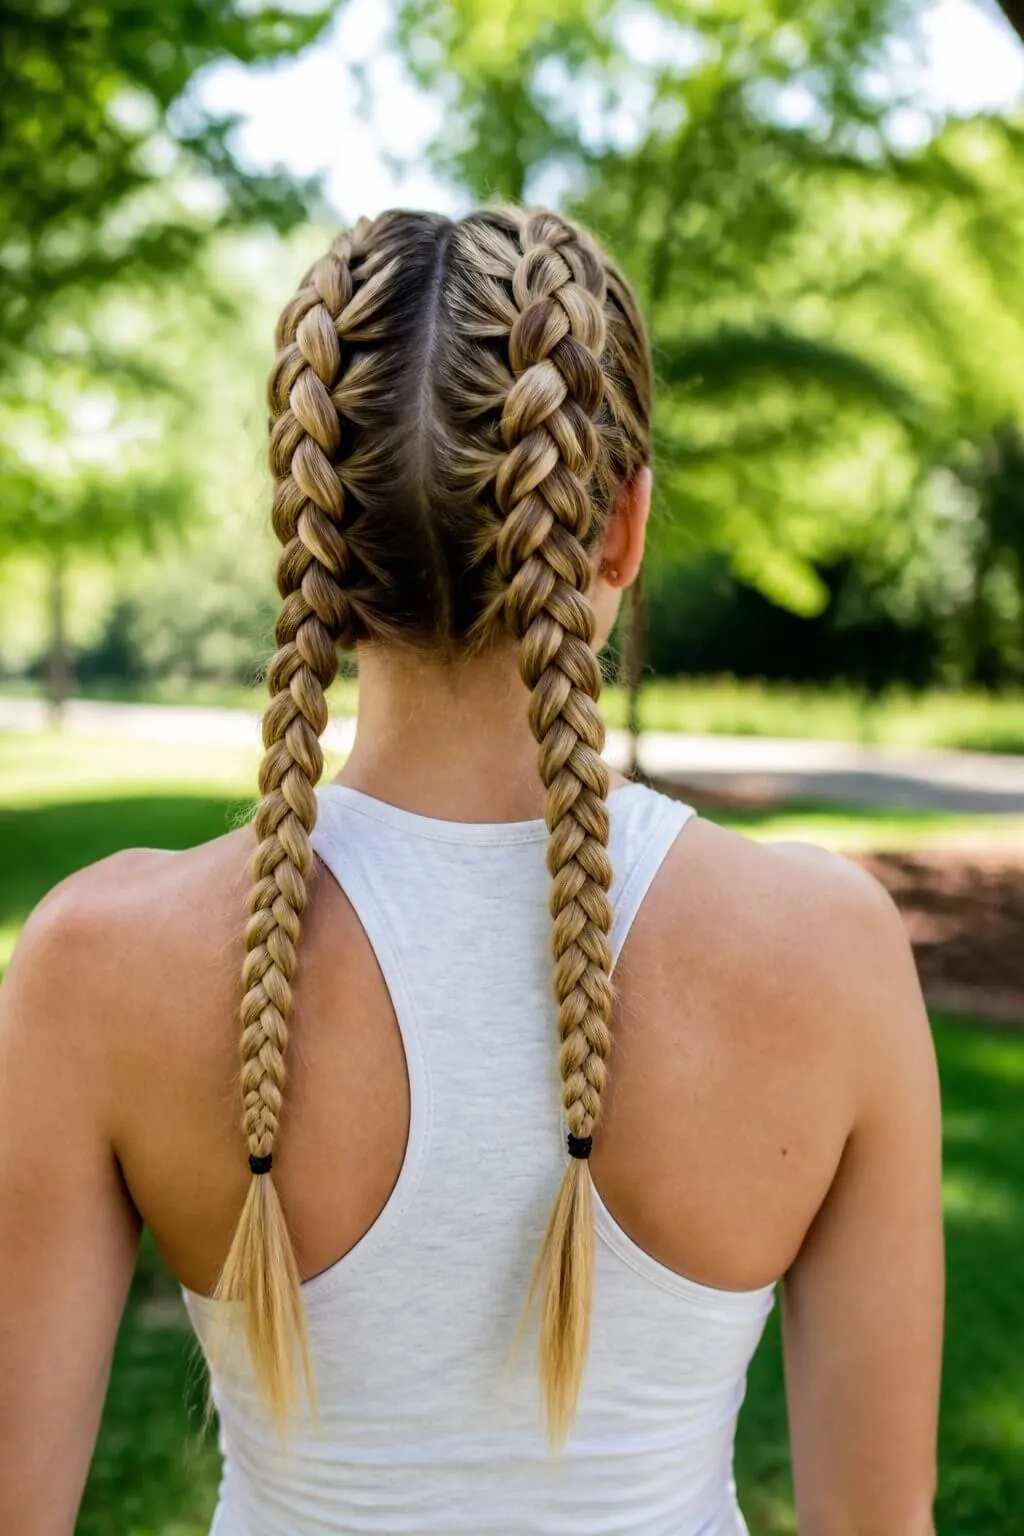
Two Dutch braids land somewhere between polished and playful. These sit close to the scalp on both sides, keeping hair fully off the neck and face, which a single center braid can’t quite pull off. Look closely, and you’ll notice the raised, popped-out texture Dutch braids are known for, which comes from each strand crossing under instead of over.
Best For: Workouts, travel days, or basically anywhere hair needs to stay put without a flyaway working loose by noon.
3. Box Braids With Curled Ends
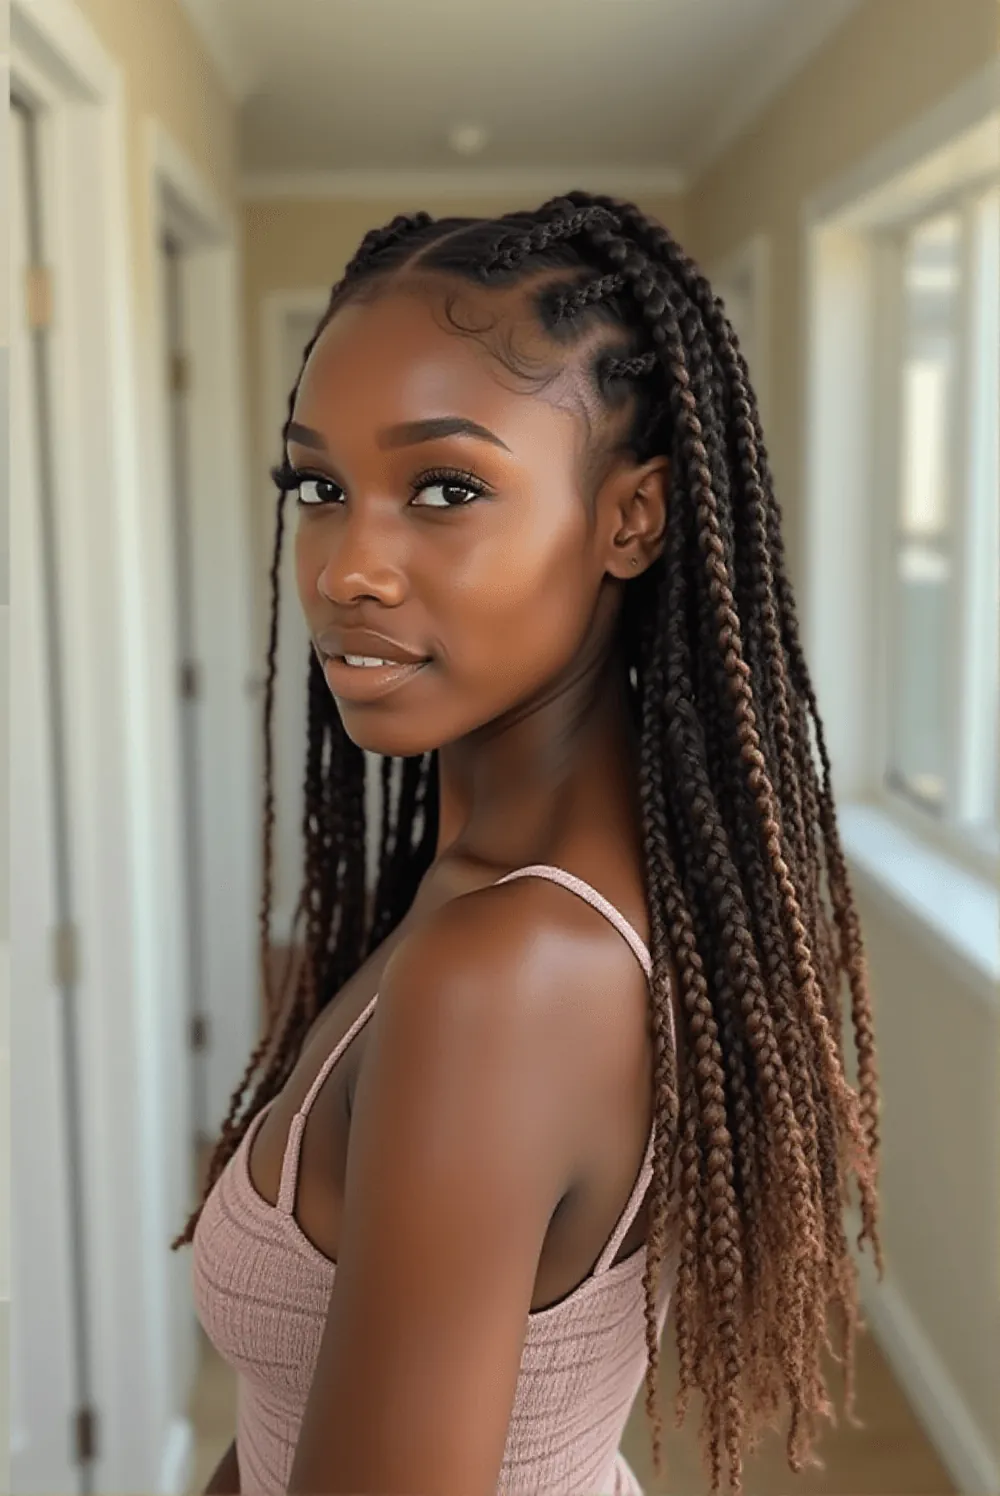
Box braids section off the scalp into little squares, which are then braided using extension hair to add length and thickness. There is a neat parting in this picture right at the crown of the head, with the hair falling into soft-looking tresses below the shoulders.
Quick Tip: Ask your stylist to leave that first inch near the scalp a little looser than feels right. A tight start at the root is usually what causes edge strain later on, not the length of the braid itself.
4. Fishtail Braid With a Wrapped Base
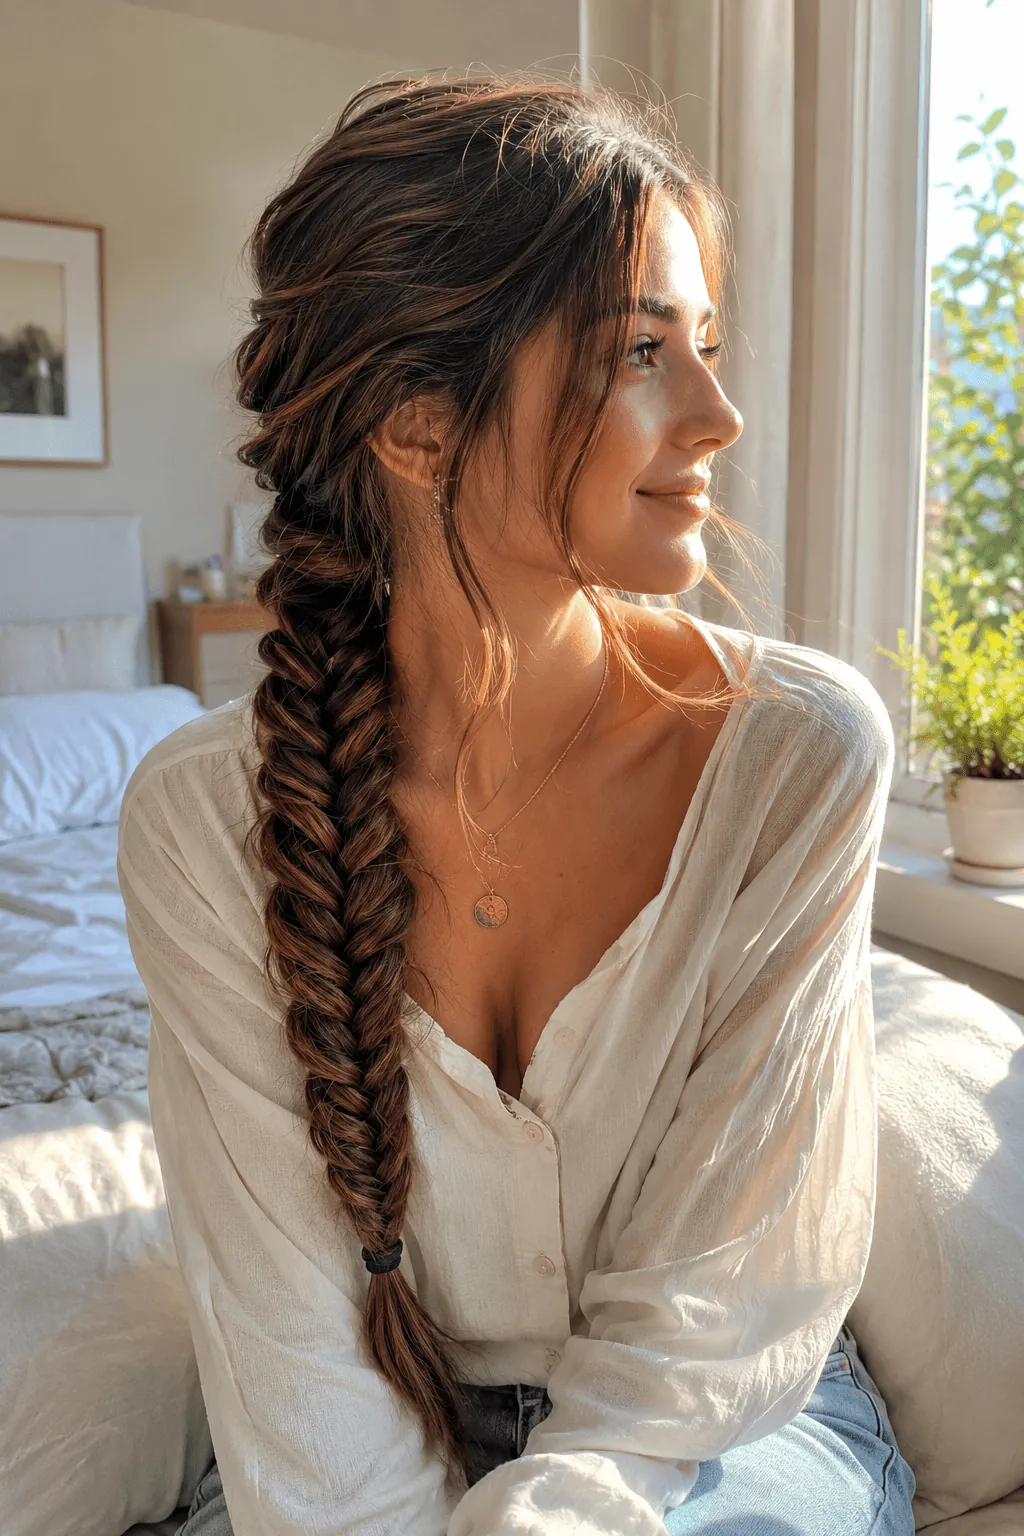
The fishtail is complex but basically consists of only two strands rather than three. The strands are crossed from outside each strand into the middle one after another until there is no more hair left to braid. Here, the braid is loose and placed on one shoulder, with flyaways scattered on the face.
Good to Know: Pull it apart a little after you finish braiding. A slightly undone fishtail reads more relaxed than a tight one, and it holds up longer through the day too.
5. Waterfall Braid With Loose Curls
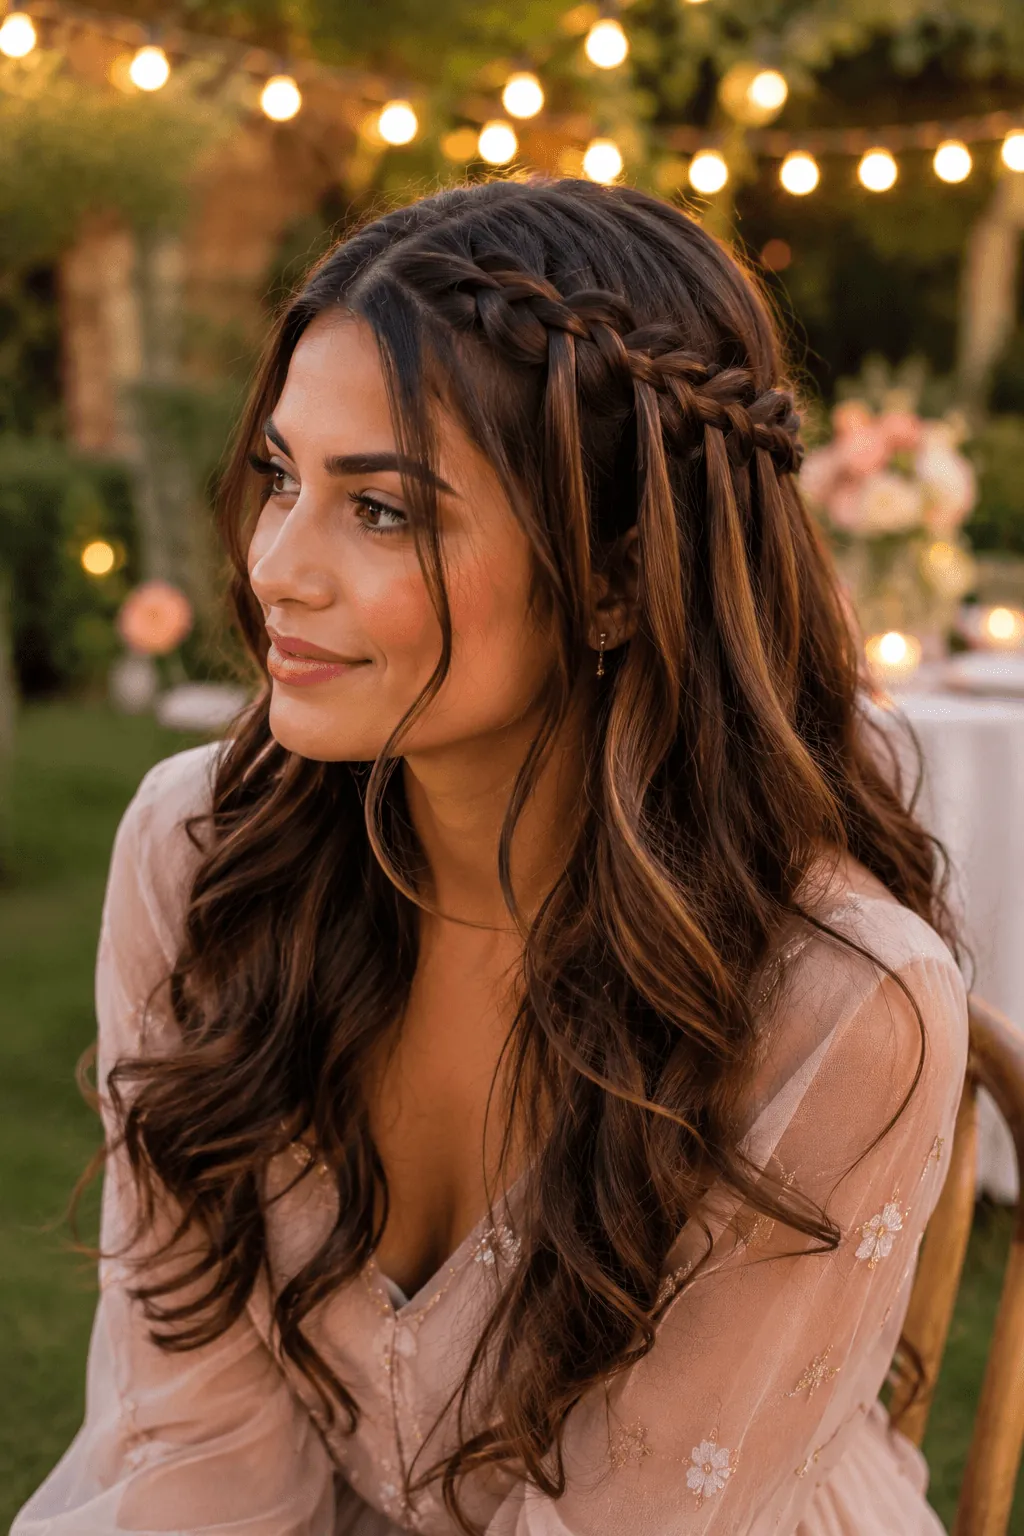
A waterfall braid appears to be similar to a French braid, but with the only difference that a strand is let go at every crossing of the weave. This strand hangs loose, hence causing hair to “waterfall” from above while the braid continues to weave side to side. The style is complemented here with some loose curls underneath.
Best For: Weddings, garden parties, or any event where hair needs to look done without feeling stiff.
6. Double Fishtail Into a Mermaid Braid
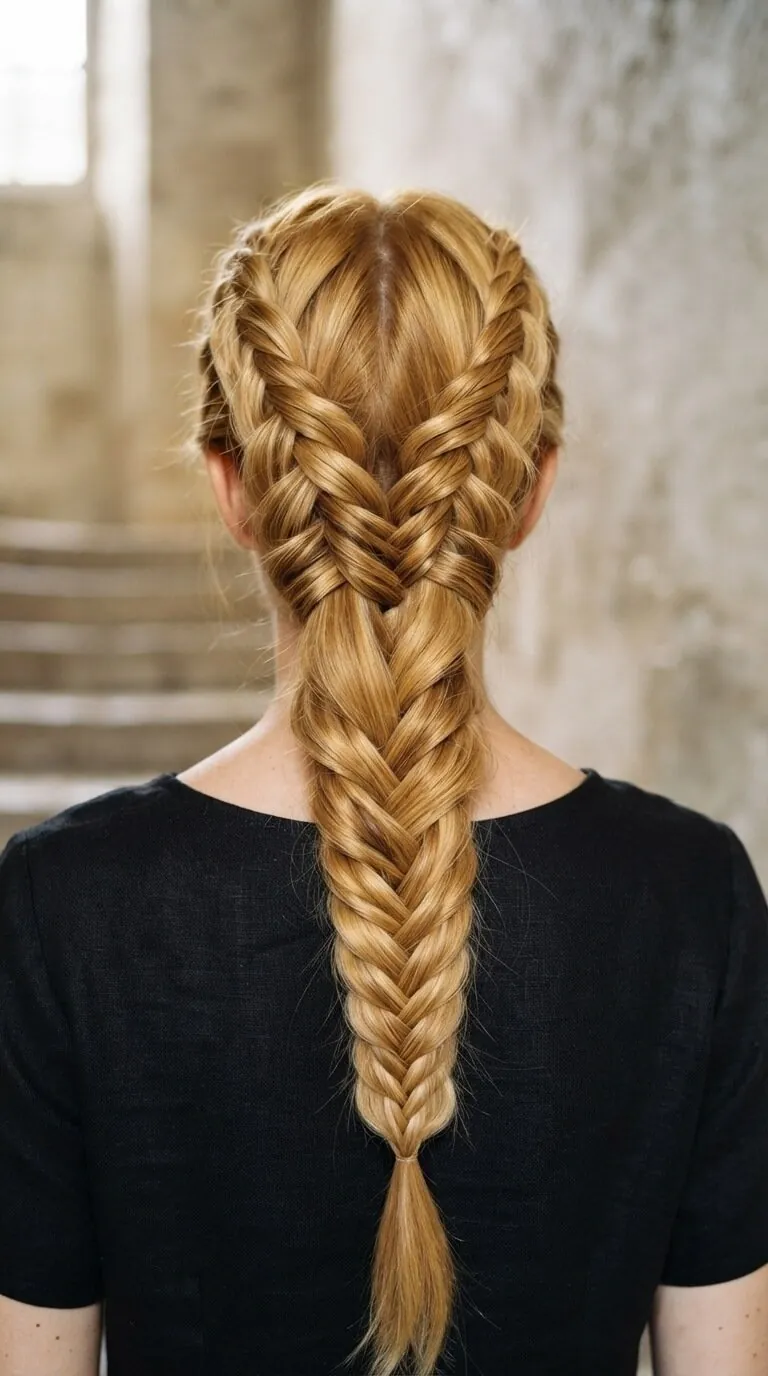
Two fishtail braids start at the crown and run down separately before they merge into one thick braid at the nape. Gray-blonde tones like these make every twist and cross easy to spot, almost like each section came with its own built-in highlight.
Good to Know: Highlighted or balayage hair shows this technique best, since the color shift between sections makes the braid pattern easier to follow.
7. Wrapped Crown Braid With Ringlet Curls
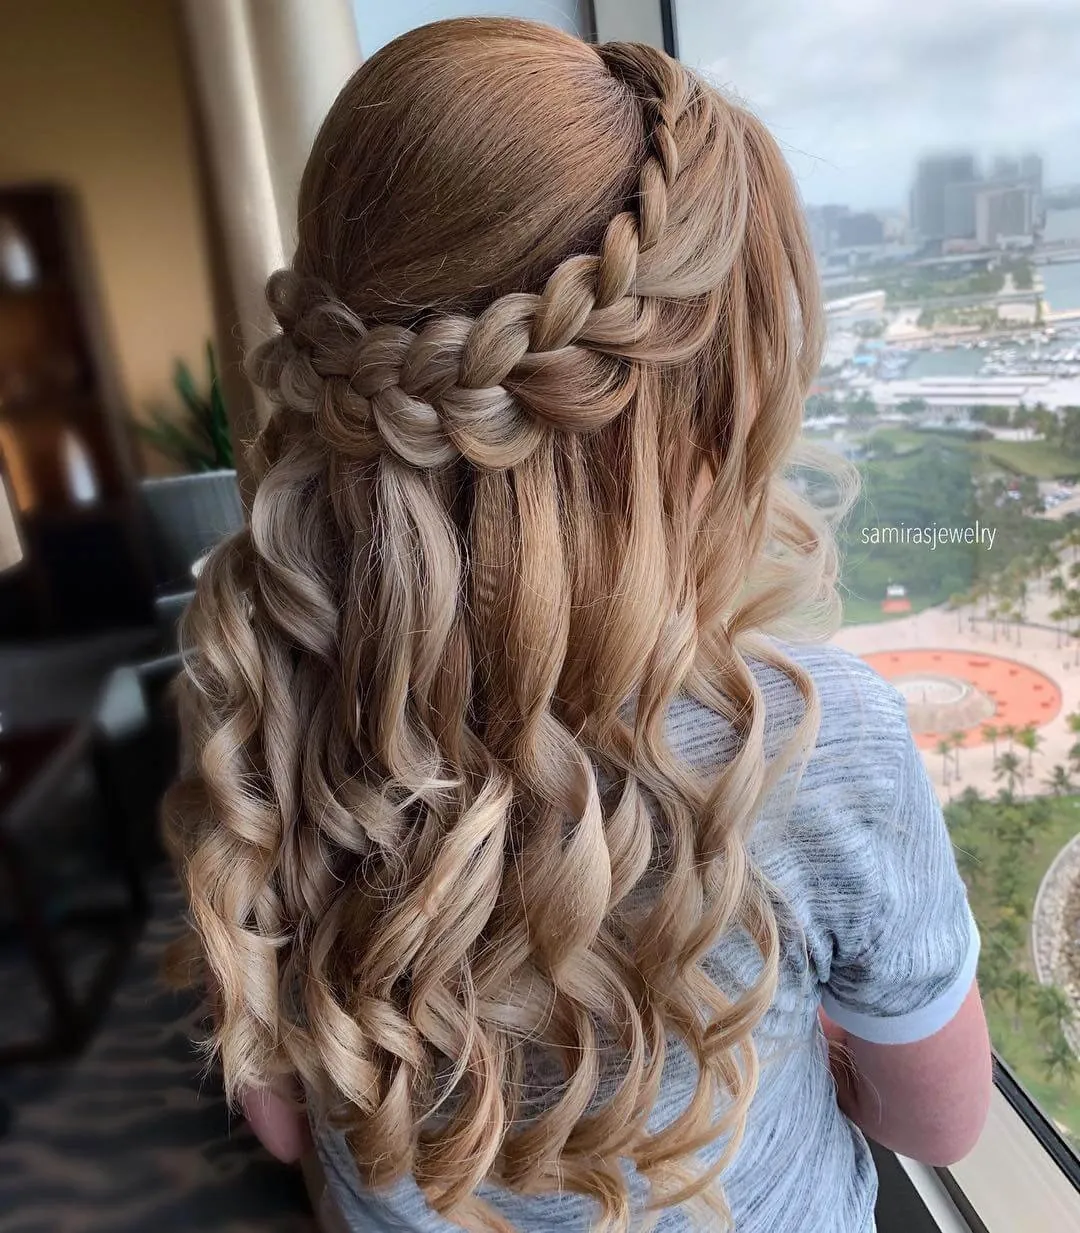
A single braid wraps horizontally across the back of the head like a headband, picking up small sections from the top as it moves from one side to the other. Nothing gets dropped along the way, every piece stays locked into the plait until it reaches the opposite side. Below the braid line, tight ringlet curls take over completely.
Quick Tip: Curl the hair before starting the braid, not after. Pre-curled strands hold their shape better once released from the plait than hair curled after the fact.
8. Viking-Style Multi Braid With Loose Strands
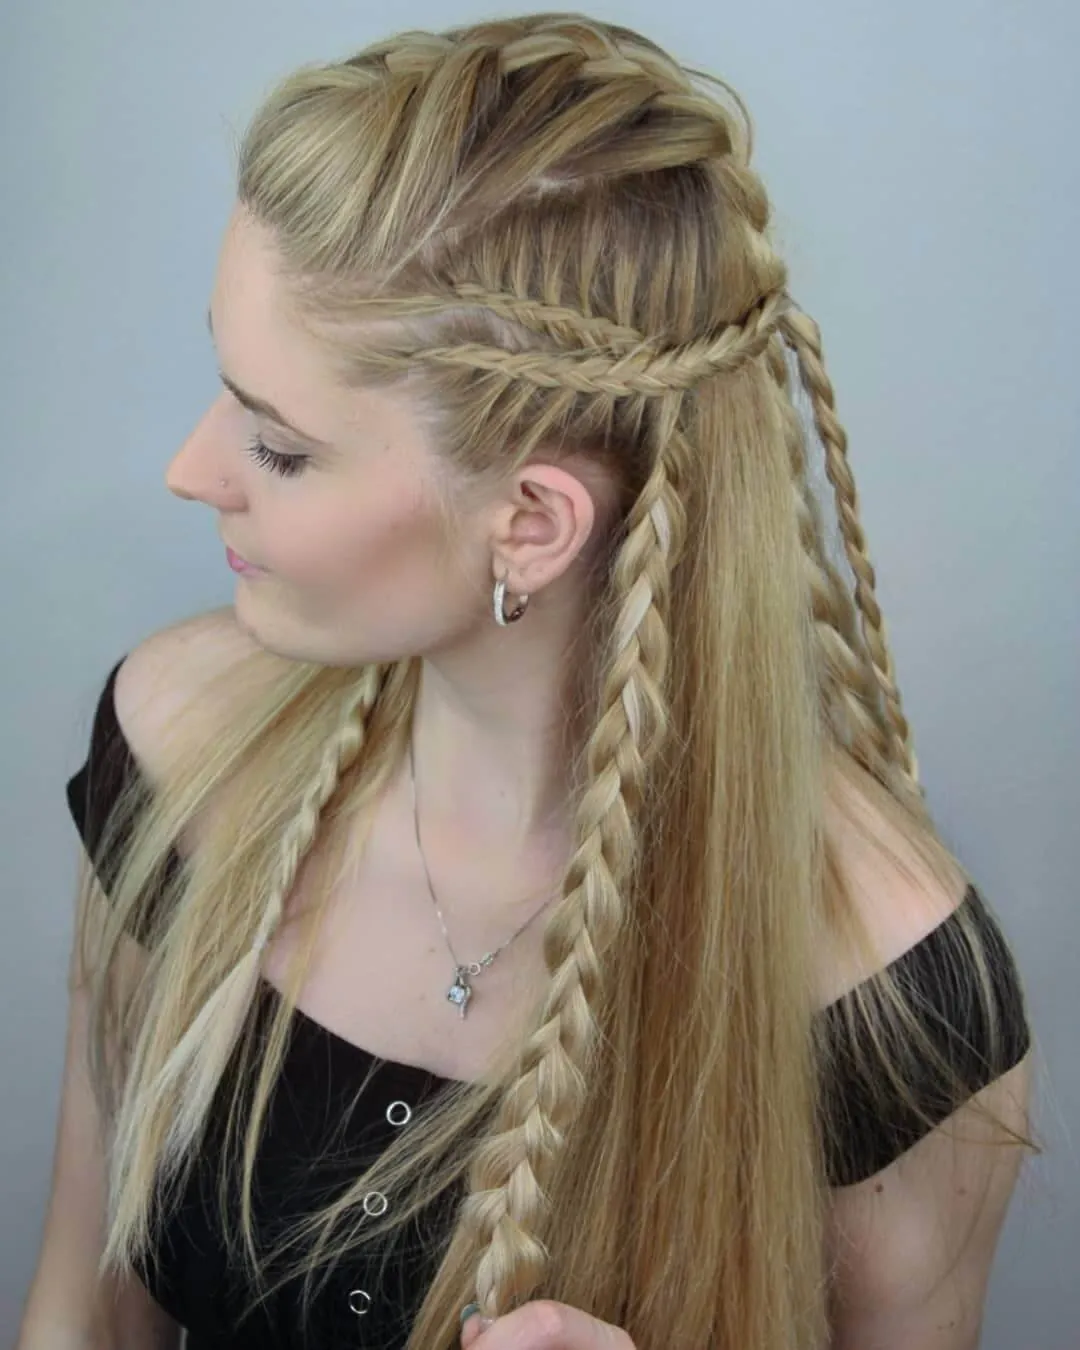
Instead of one focal braid, this style scatters four or five thin braids through the top and side sections, letting them hang loose against straight, unbraided lengths underneath. Some braids are tight three-strand plaits, others use a looser fishtail, so no two look exactly alike even though they sit side by side.
Good to Know: There’s no wrong order here. Start with one braid near the part and add more as you go, spacing them randomly instead of evenly for a look that reads intentional, not accidental.
9. Milkmaid Braids
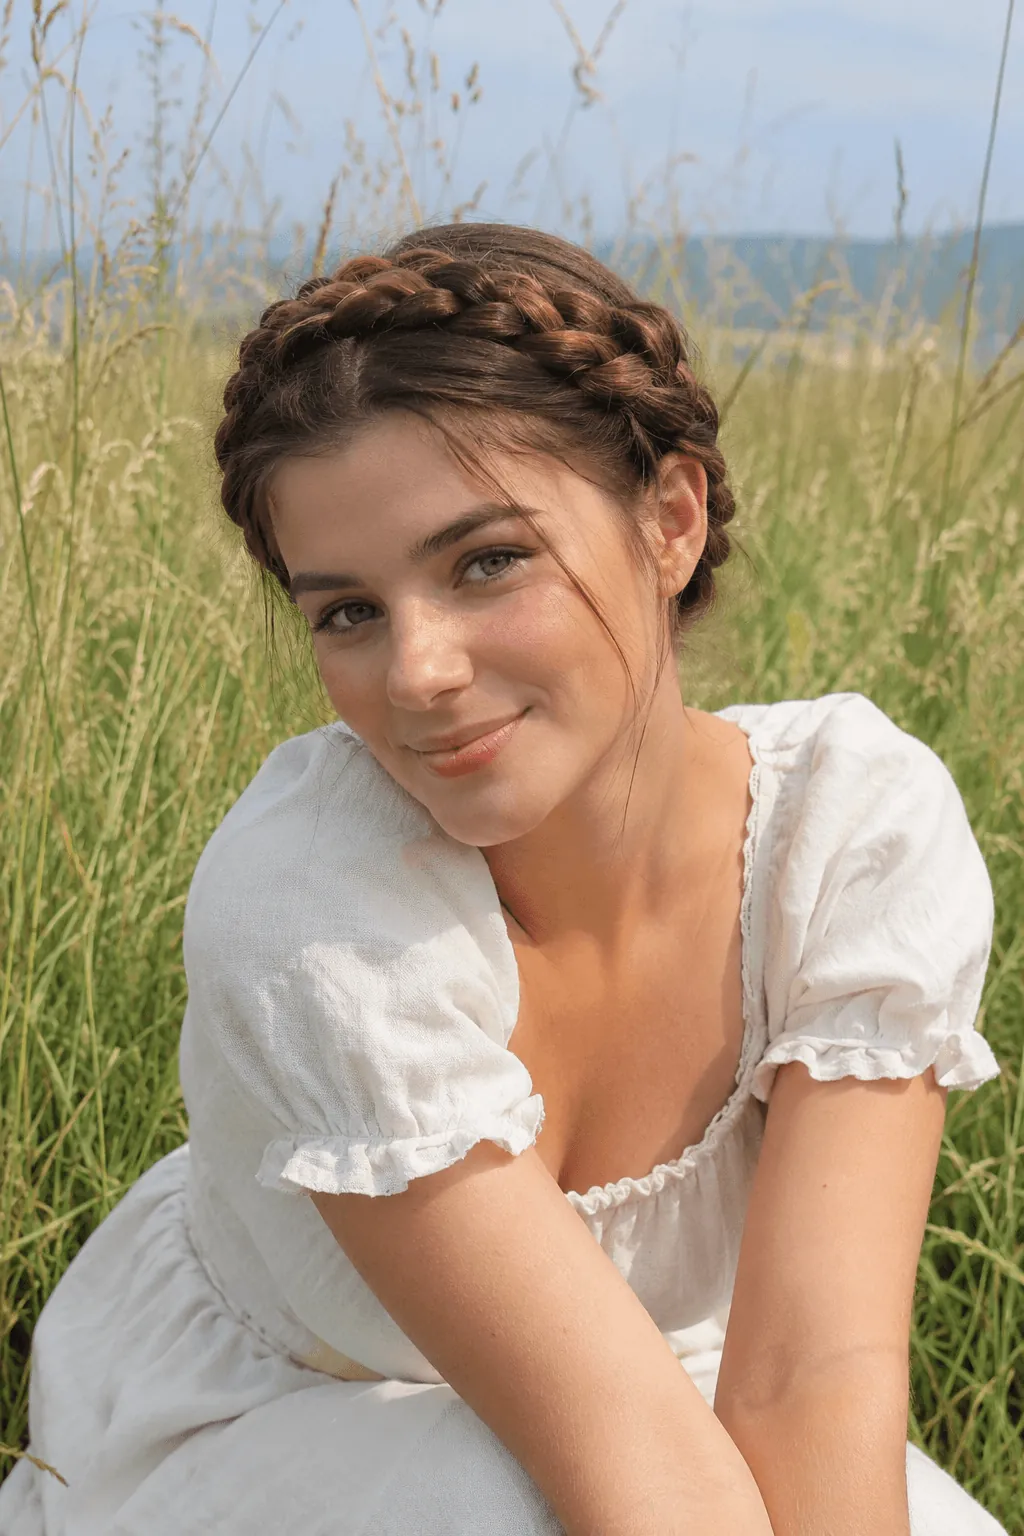
Two braids start low on either side of the head, cross over the crown, and tuck in near the opposite ear. No pins show on the outside since the tucked ends do all the securing work underneath.
Recreate This Look: Braid two low pigtail braids first, cross the right braid over the crown to the left side, then tuck and pin each end just behind the opposite ear.
10. Two-Strand Rope Twist Braid
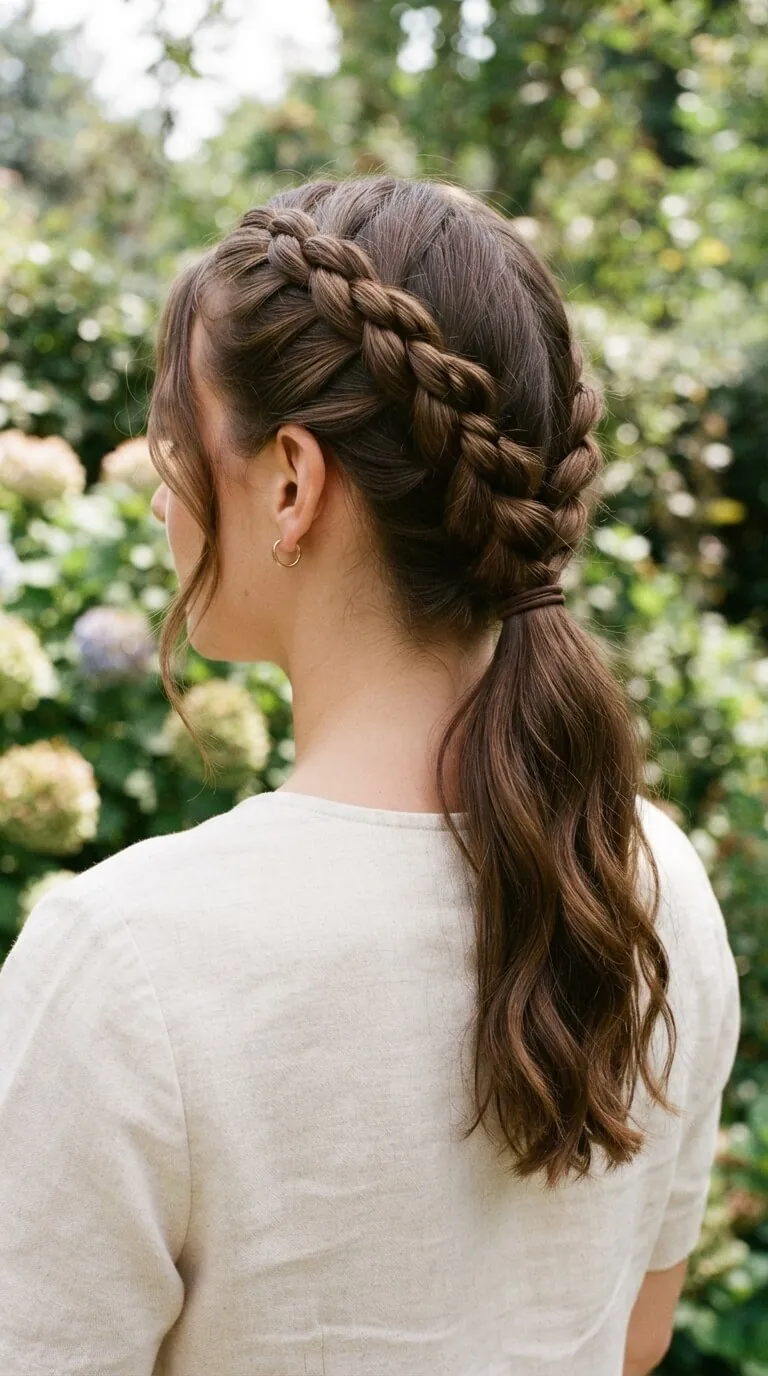
Forget the usual over-under weave. A rope braid only needs two sections twisted individually in one direction, then wound around each other in the opposite direction. The tension between the two twists is what locks the shape, not any actual braiding motion.
Good to Know: It takes about half the time of a regular braid, which makes it the easiest option on mornings that call for a low ponytail with a little more shape.
11. Thick Goddess Braids
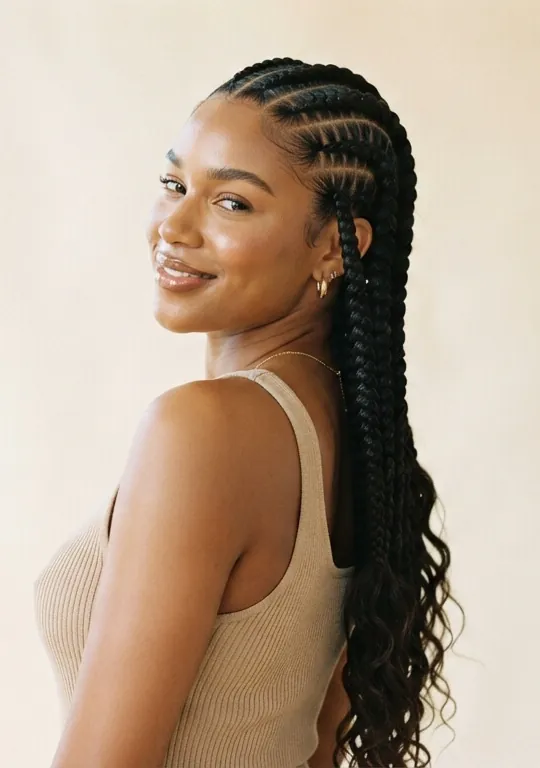
Goddess braids use the same straight-back pattern as cornrows, but each row is built thicker and often raised slightly off the scalp using added extension hair. The larger scale changes the whole feel, from a flat, close-to-the-head look into something bolder and more sculptural.
Best For: Anyone who wants the low-maintenance benefits of cornrows with a bolder, more dramatic finish.
12. Braided Space Buns
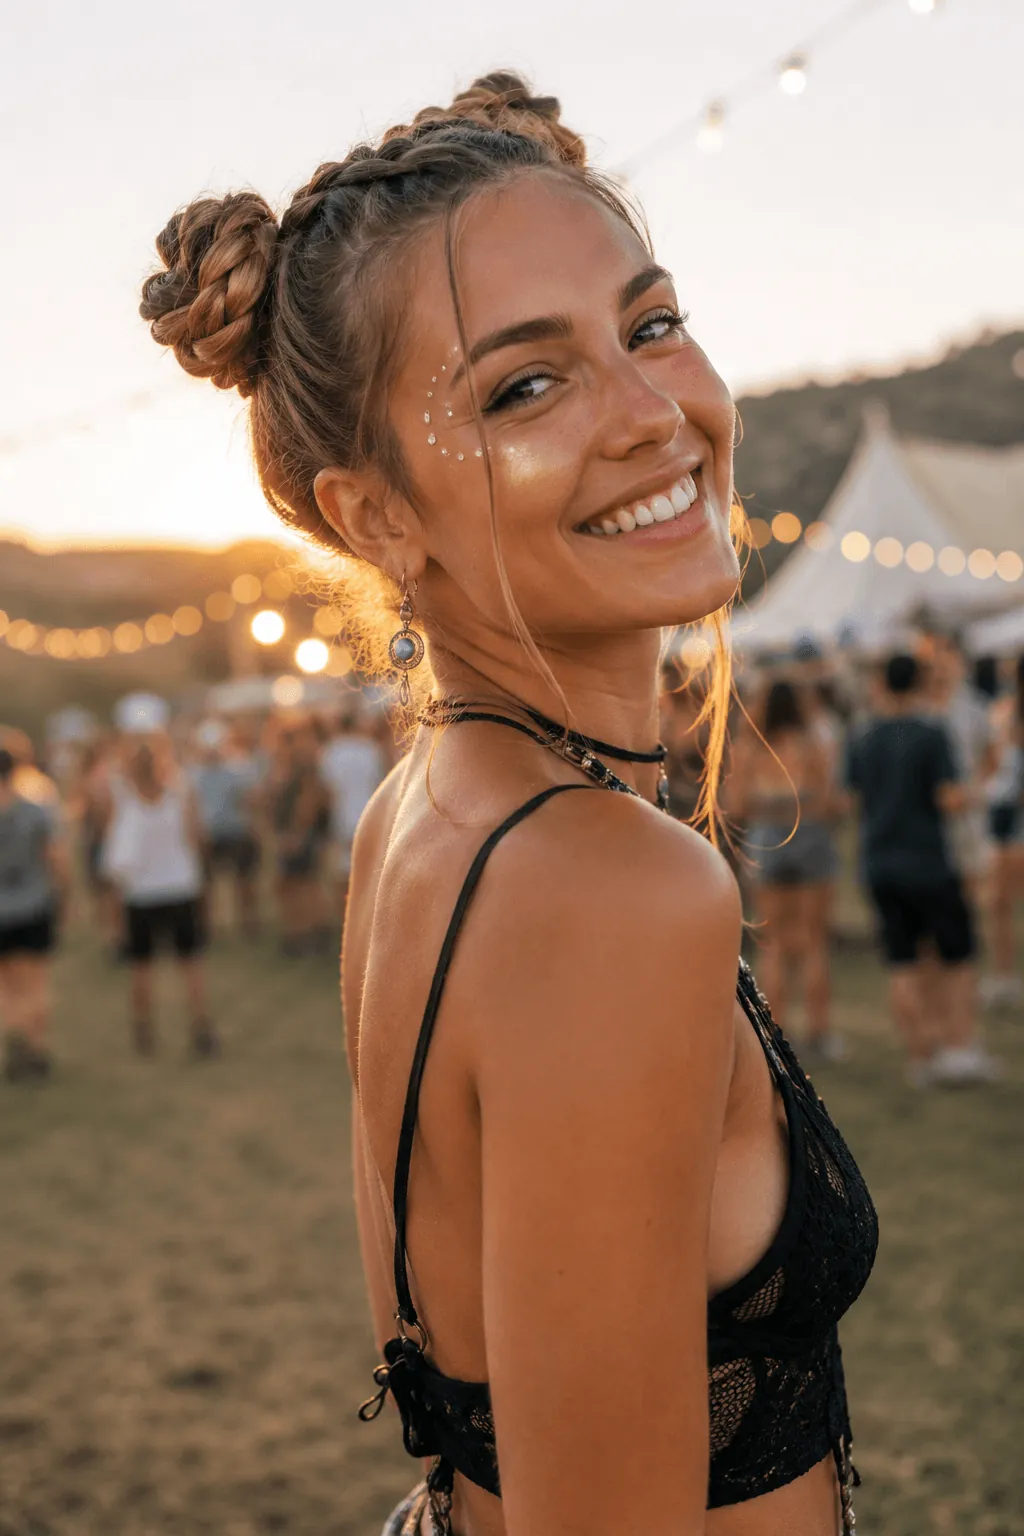
Space buns get an upgrade when each side starts as a small braid instead of a plain twist before winding into the bun. The braided base adds texture that peeks through the bun itself, so it reads more finished than the typical two-bun look.
Step 1: Split hair in half to form two equal sections
Step 2: Braid each section about halfway down before securing with an elastic.
Step 3: Coil the remaining braided length around the base into a bun and pin.
13. Bubble Braid Ponytail
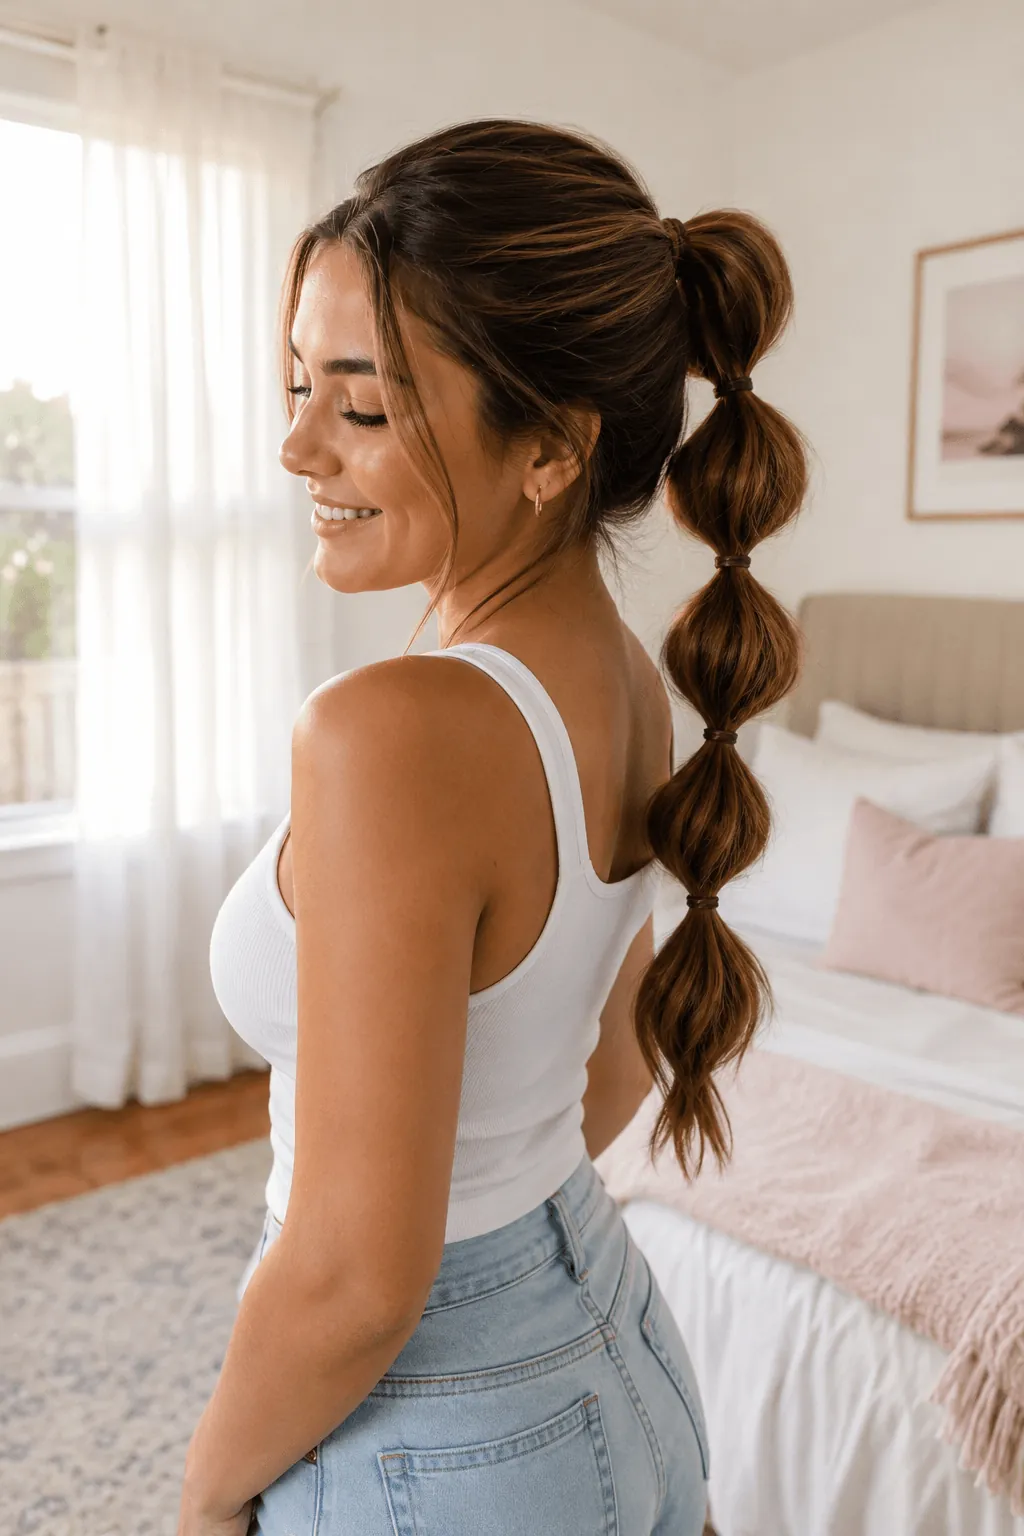
There is no weaving process involved; this often shocks many people after they discover it. Ponytail strands are partitioned into smaller sections using very thin clear elastic ties at intervals of two inches or so; thereafter each section is pulled outwards to give it volume resembling a braided hairstyle without any crossing of strands.
Quick Tip: Pull the bubbles from both sides evenly, not just the top. Pulling from only one direction flattens the shape instead of rounding it out.
14. Classic French Braid
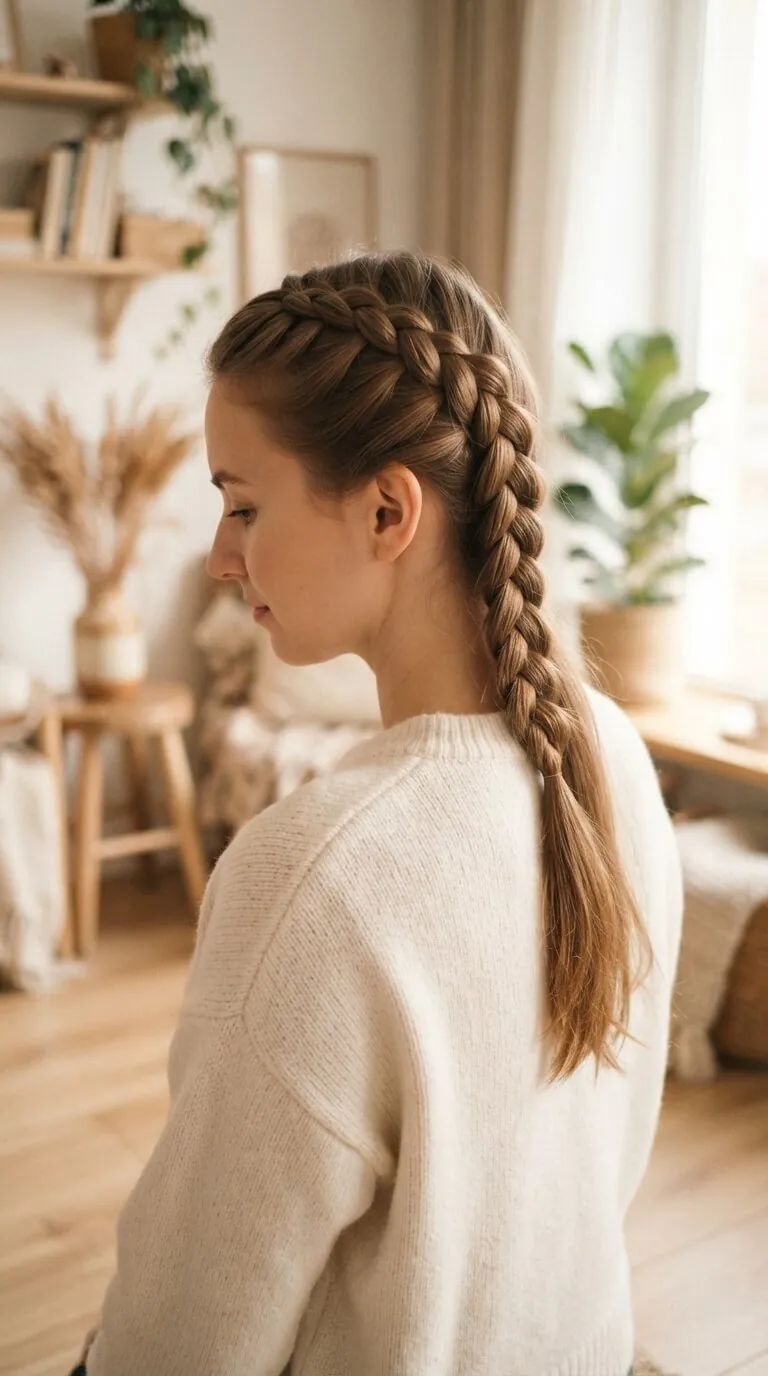
All of the complex braids on this list originate from this one. The three strands cross over the middle in rotation, taking tiny bits of new hair from each side as they do. It’s quite easy to look at from a distance, but the key is having uniform tension throughout or else the plait will tilt off to one side near the nape.
Good to Know: Damp hair grips better than freshly washed, bone-dry strands, which tend to slip out of the crossing pattern before you can secure the end.
15. Knotless Braids
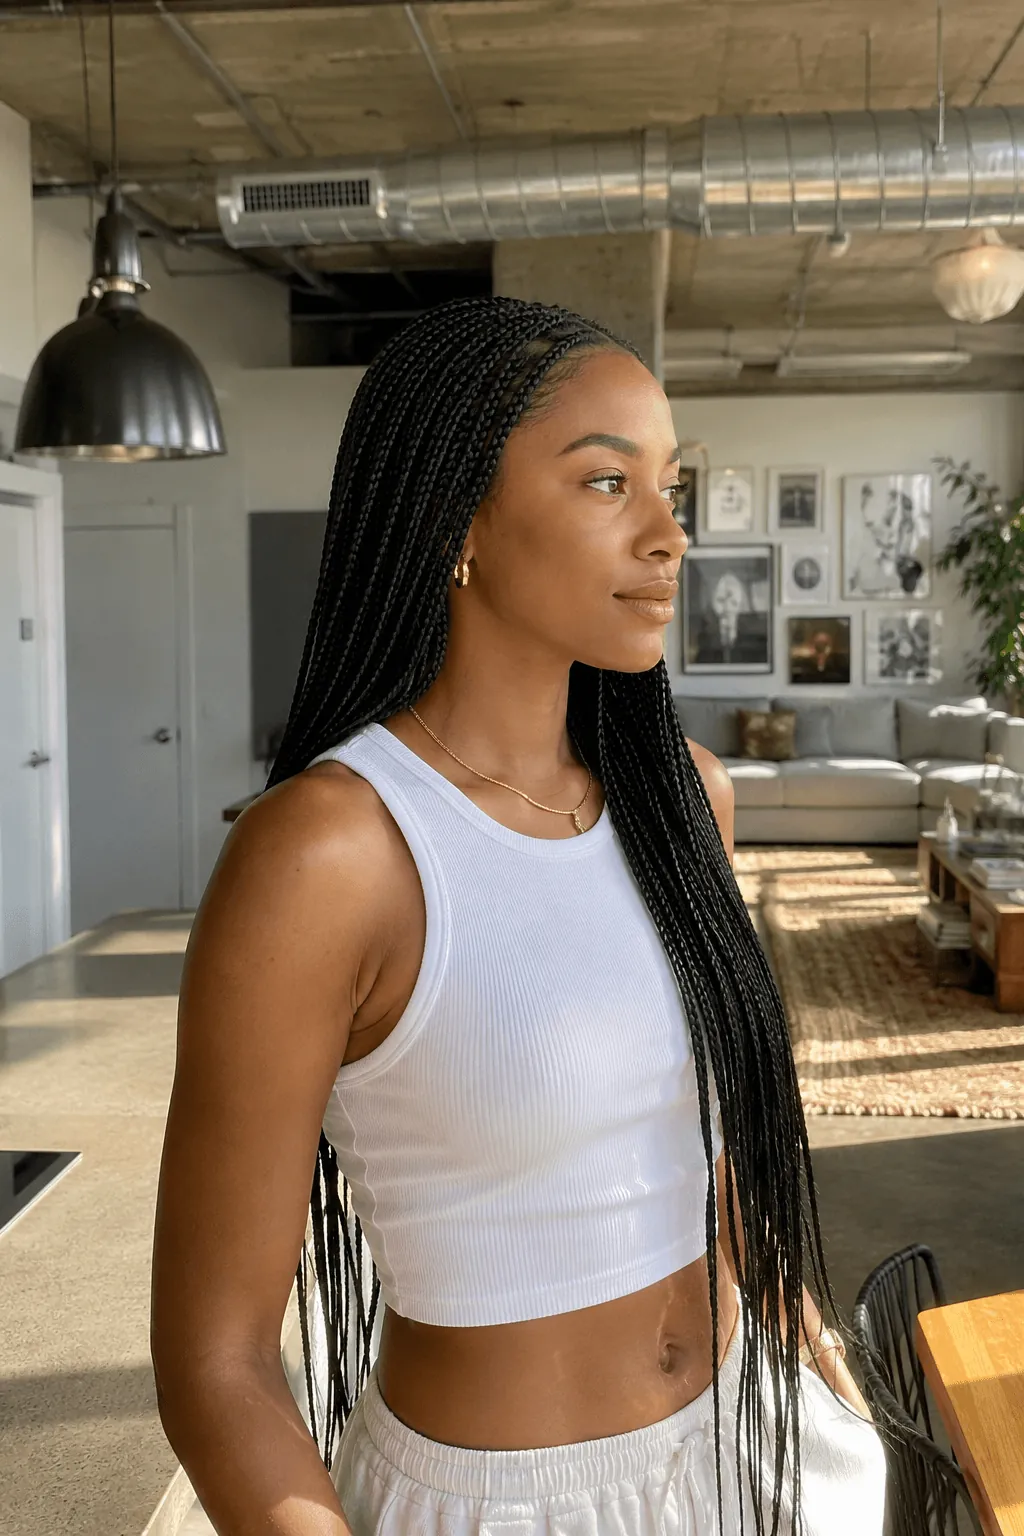
Knots are usually used for traditional braiding, where you begin by creating a firm knot near the roots to tie down the hair extensions. In knotless braiding, no knot is created at the base; instead, extension hair is gradually woven in as the braid develops.
Best For: Anyone who finds regular box braids too heavy or tight on the scalp during the first few days.
16. Feed-In Braids
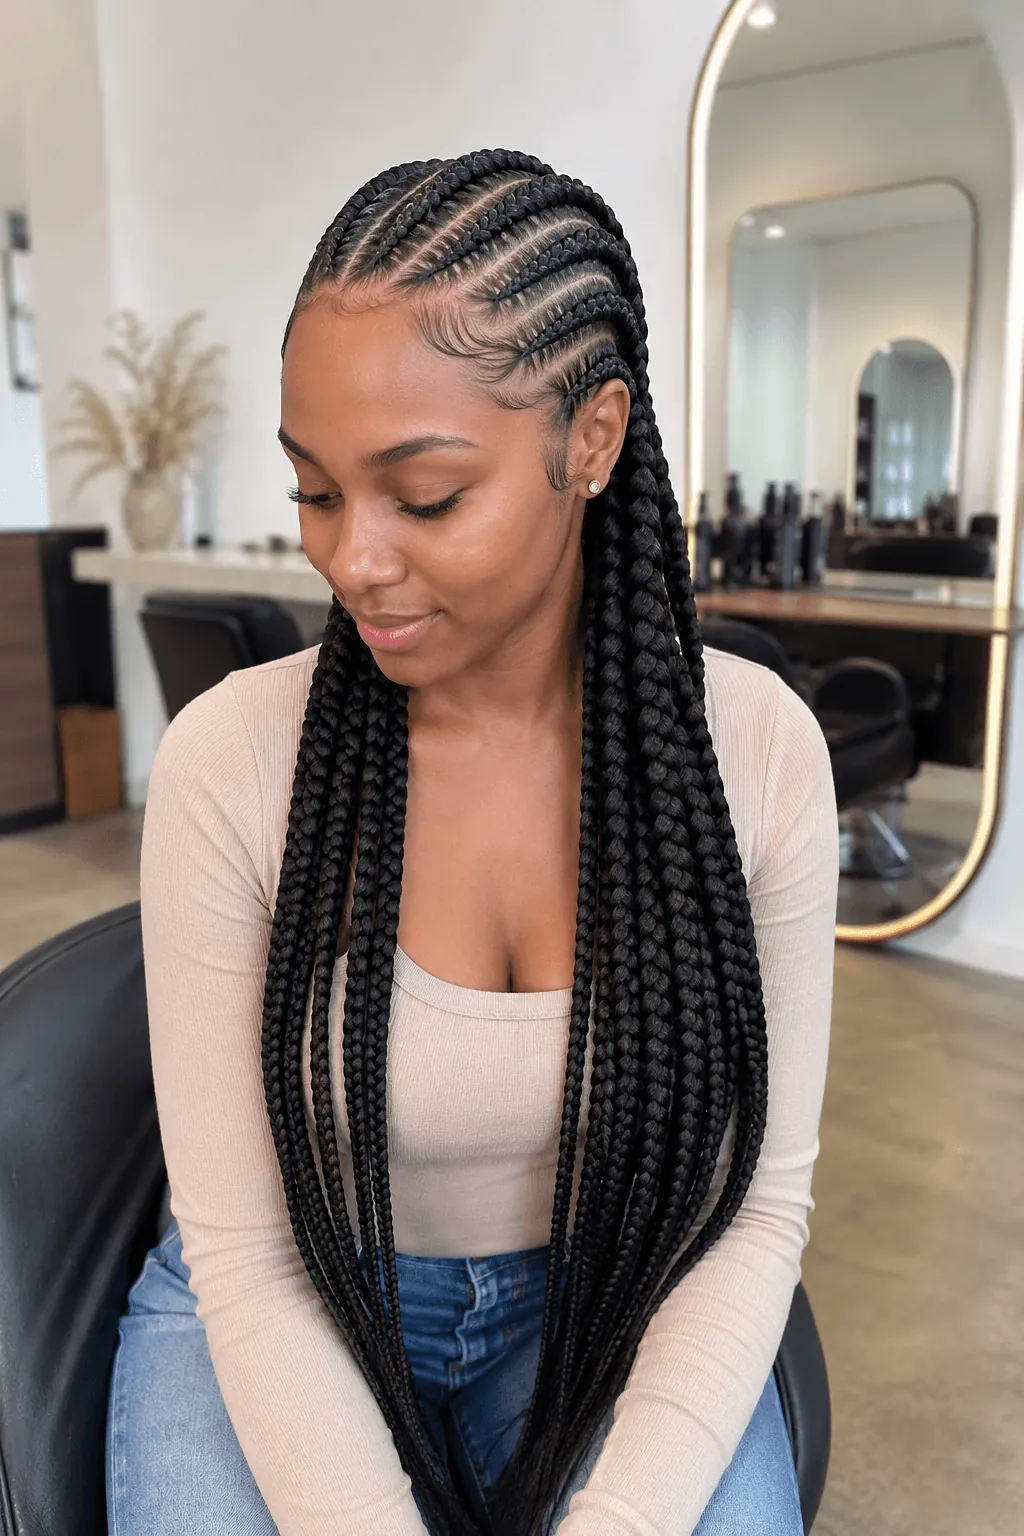
While feed-in braids also add hair gradually like knotless styles, they focus on creating a sharp, tapered cornrow effect along the scalp. The row starts thin right at the hairline and steadily thickens as it moves back, making the braid look like it is growing directly from the scalp.
Quick Tip: Ask your braider to go slow on the feed-in right at the hairline. That first section is usually where things go wrong, rush it, and the base ends up looking bulky instead of seamless.
17. Lace Braid Headband
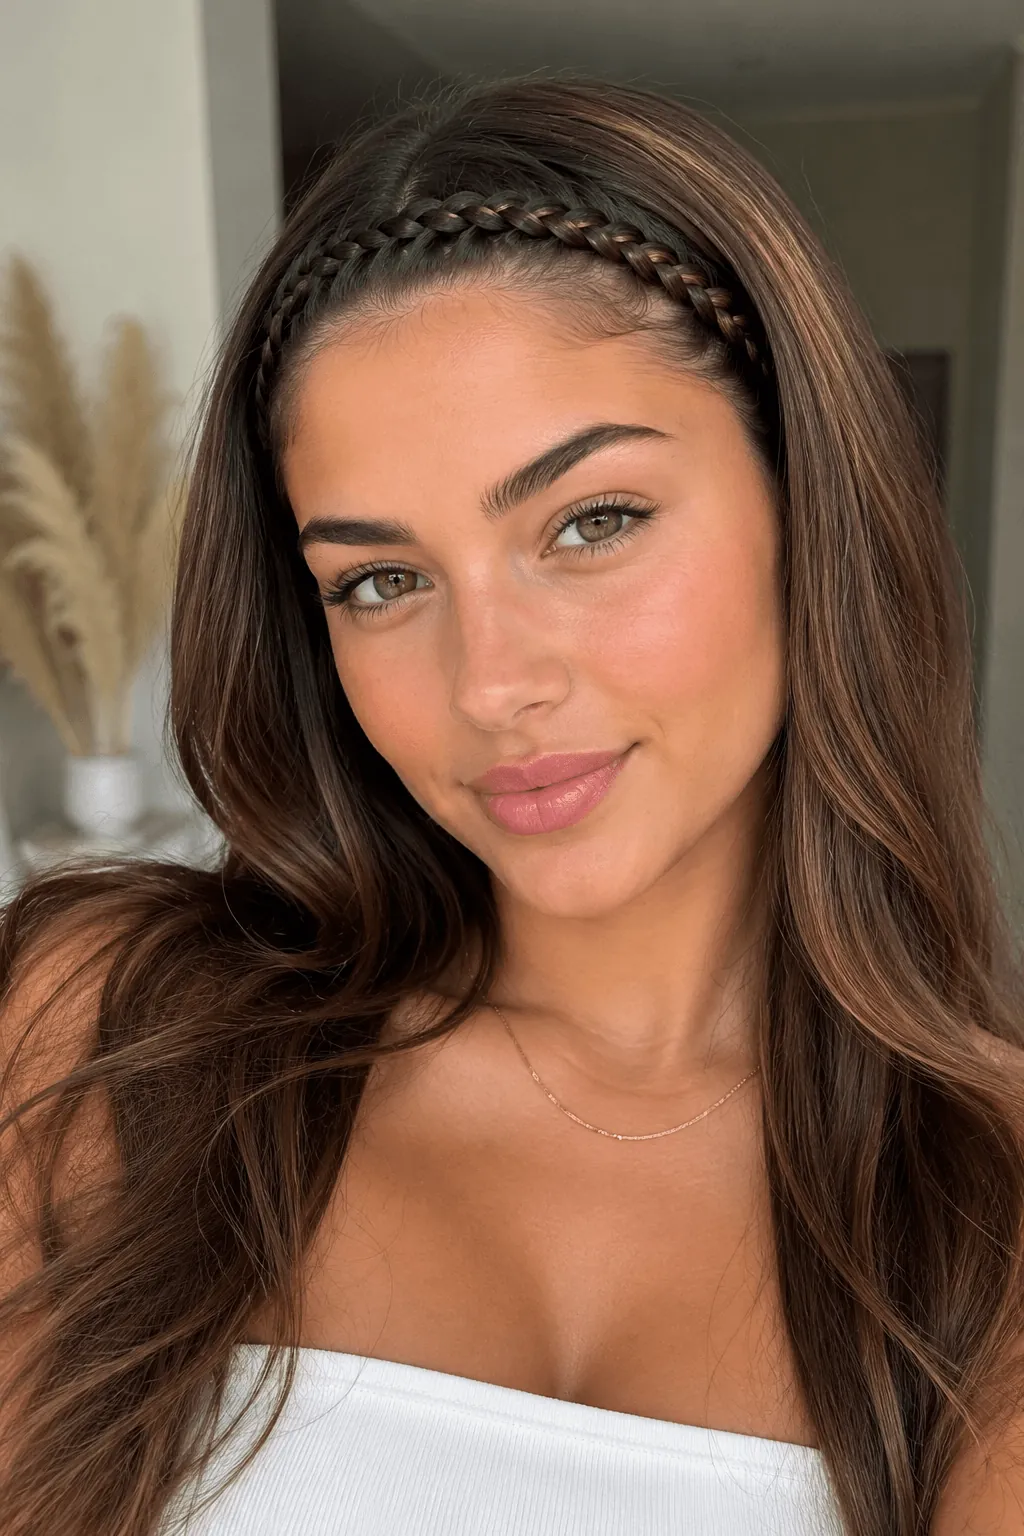
This particular style does not involve any bun or ponytail. It involves a simple, very fine braiding of hair that starts at the temples on either side of the head, all the way across the forehead, with the remaining hair being left loose beneath the braids.
Good to Know: Starting the braid slightly behind the part, rather than right at it, keeps the front from looking too severe.
18. Twisted Braided Bun
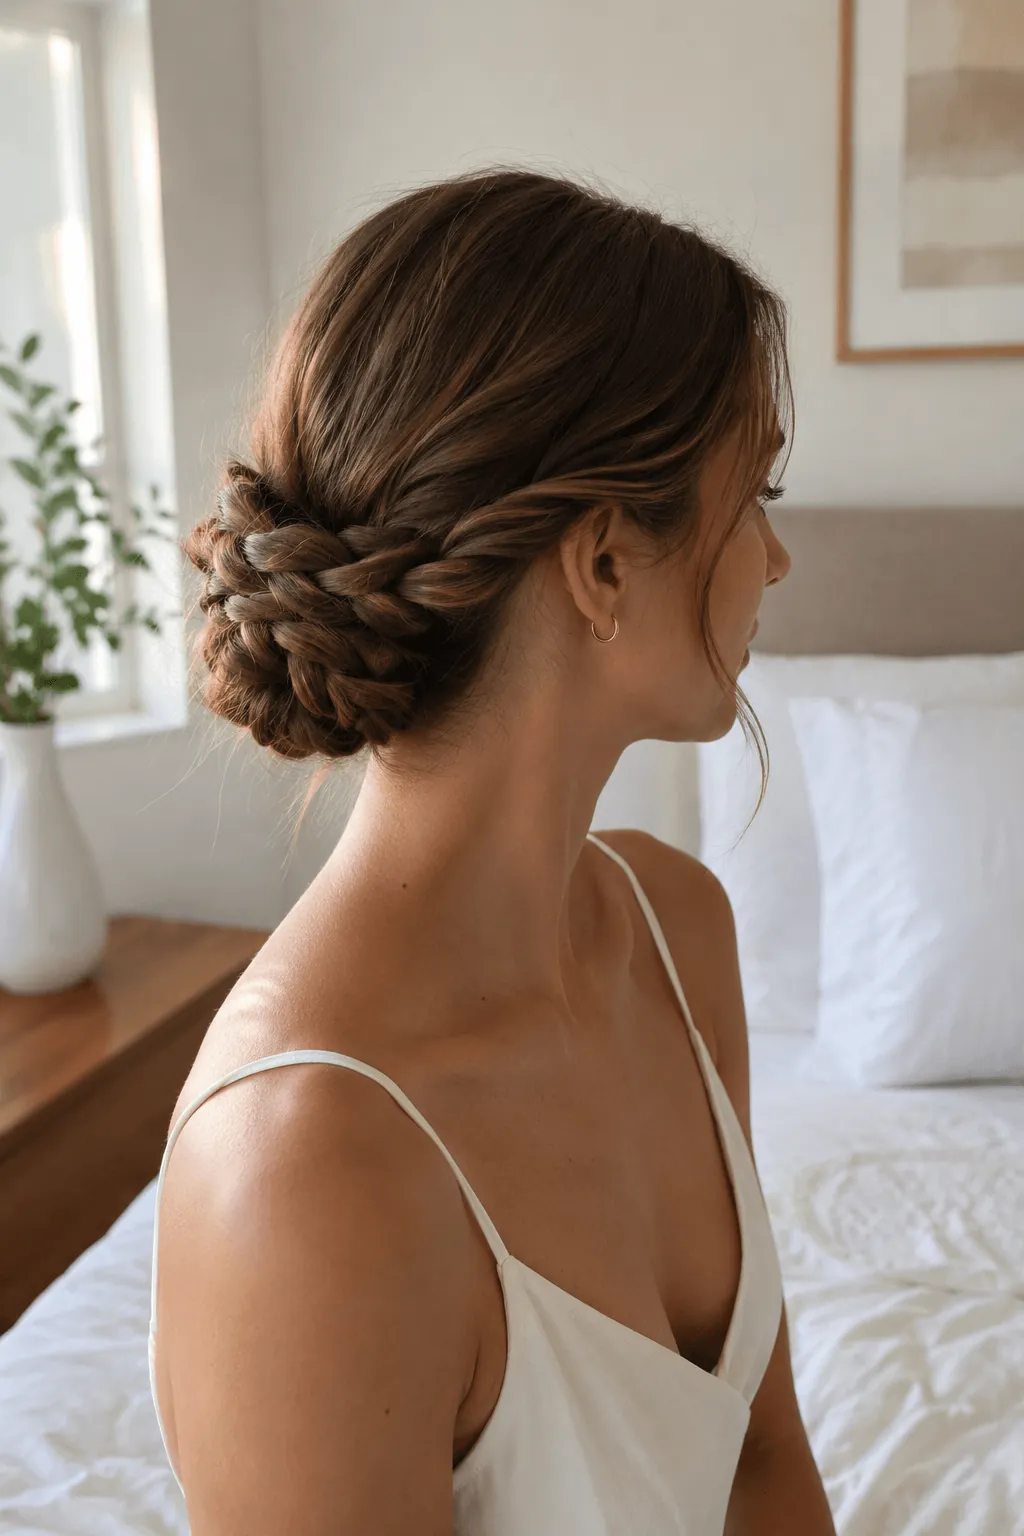
A regular bun starts with a ponytail. This one starts with a braid instead, wound and pinned into a low knot at the nape once it runs out of length. The texture stays visible even after it’s coiled, so the bun reads as detailed rather than flat.
Step 1: Braid the hair about three-quarters of the way down.
Step 2: Coil the braided section around itself at the base.
Step 3: Pin the loose ends underneath to hide them.
19. Braided Half-Up Style

Only two small sections get braided here, one from each side, meeting at the back of the crown, with the rest of the hair falling loose. It solves the problem of hair falling in your face without committing to a full updo.
Best For: Days that start with errands and end with dinner plans, since it works for both without needing a redo.
20. Chunky Three-Strand Braid
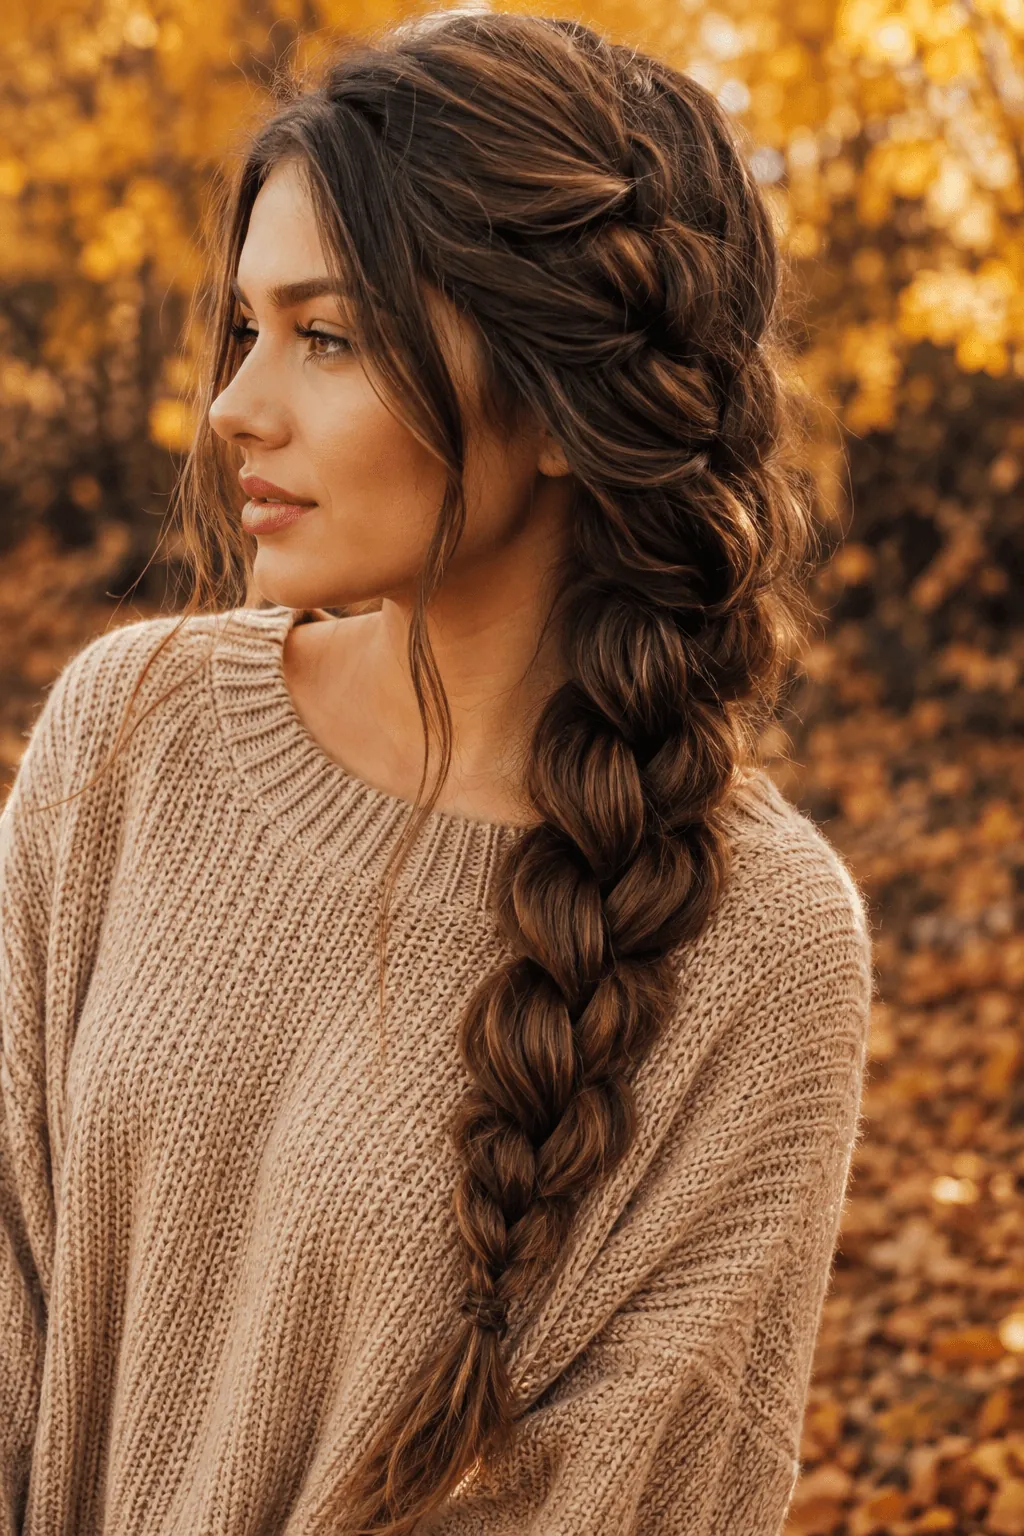
Take a classic three-strand braid and stop pulling the sections so tight. Loosening each cross before moving to the next is what gives this version its exaggerated, oversized texture, almost like the braid ate a second braid for breakfast.
Good to Know: Gently tug the outer edges of each loop after you finish braiding. It roughs up the shape further and keeps the braid from looking too neat or new.
21. Micro Braids
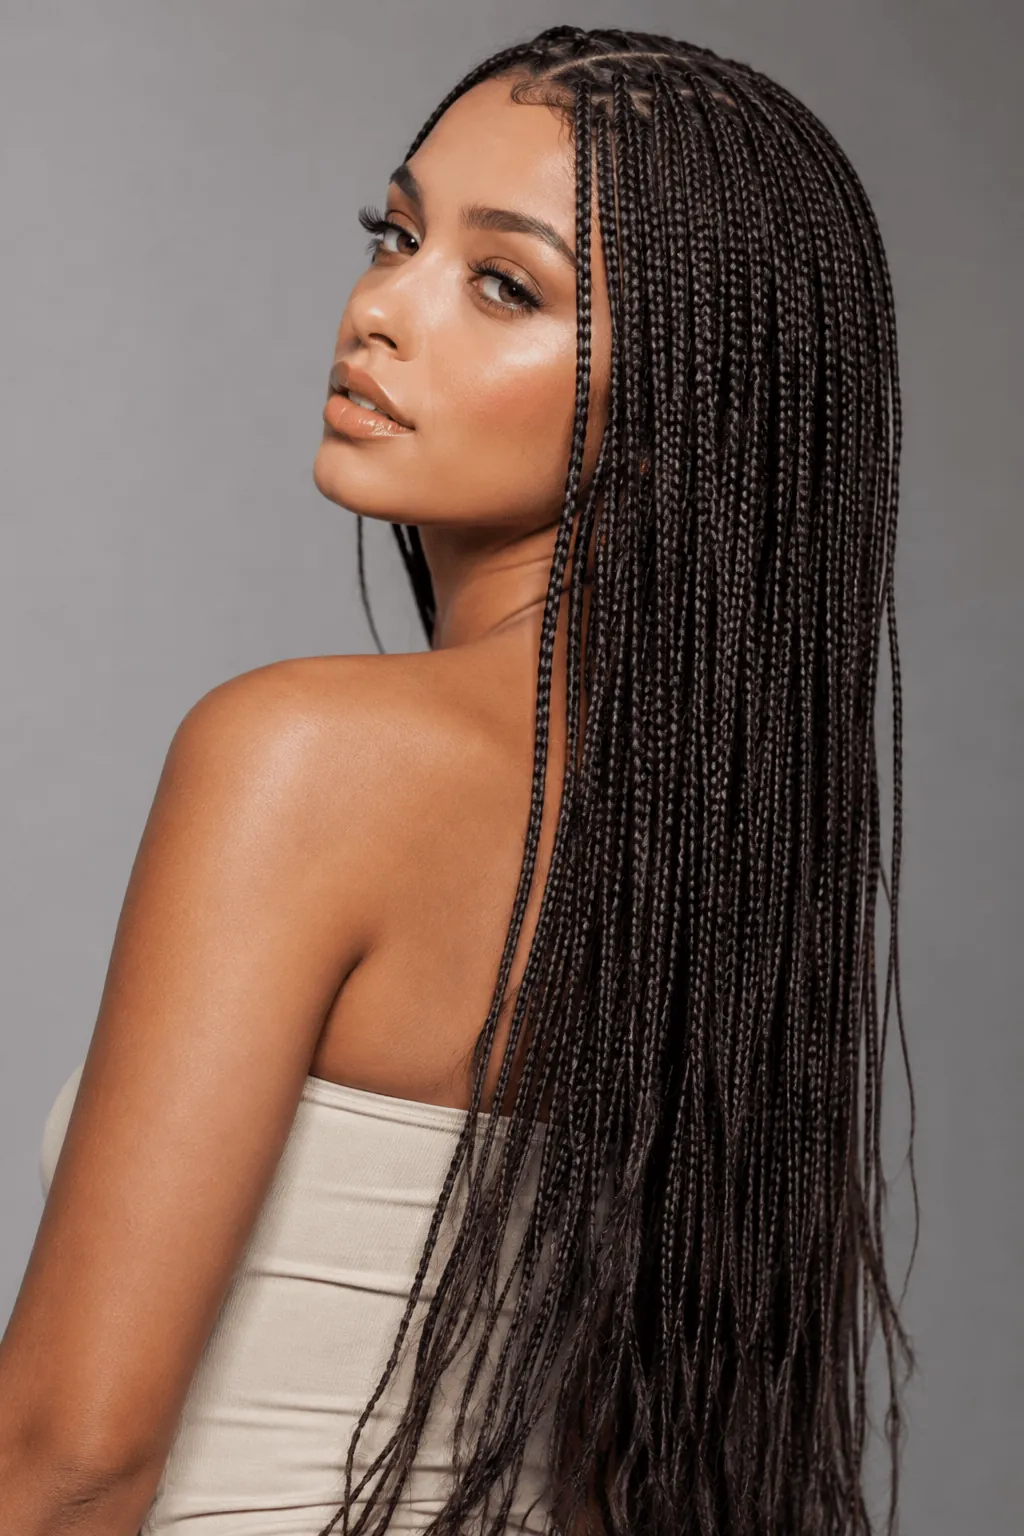
Dozens of these run across the scalp at once, each one no wider than a shoelace. Individually they’re barely noticeable, but together they create a curtain of movement that a handful of thicker braids never quite manages.
Quick Tip: With this many sections, ask your stylist to work in a fan pattern from the crown outward rather than straight rows. It keeps the finished look from feeling too gridded.
22. Cornrows Into a High Bun
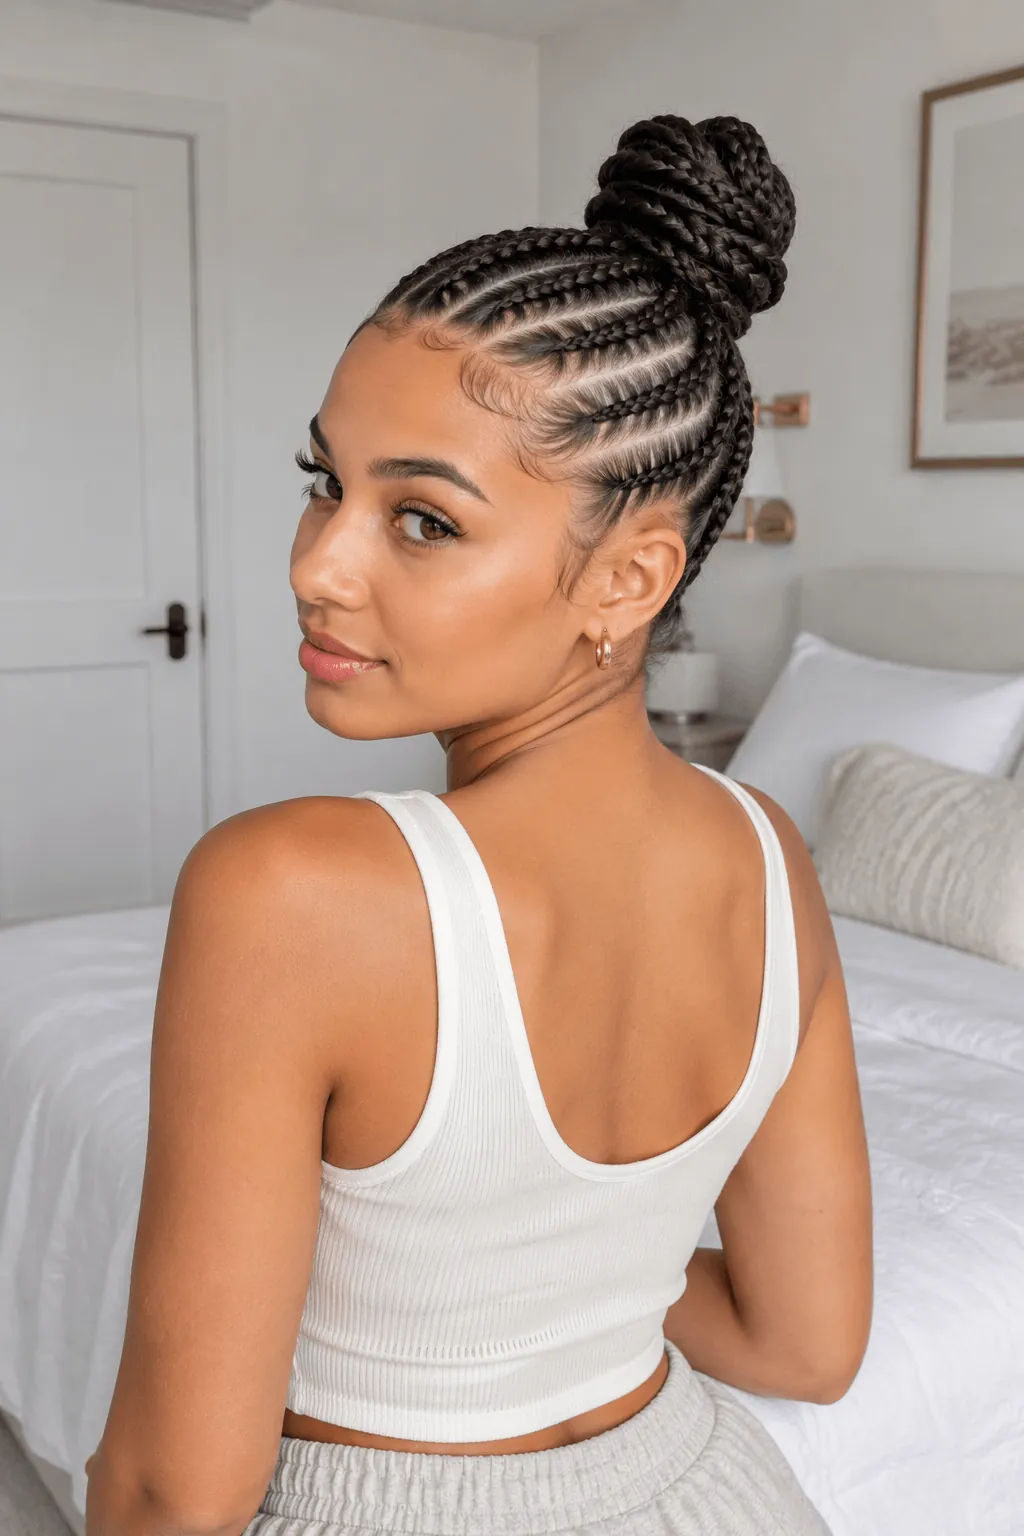
Straight-back cornrows following the natural curve of the scalp meet at the crown and gather into one high bun. The rows in this photo curve slightly toward the back instead of running perfectly straight, which softens the shape around the face.
Good to Know: Curved rows like these are usually a bit more forgiving on regrowth than straight ones, since the natural curve hides new growth longer before a touch-up is needed.
Want more scalp-braid ideas like this one?
Check out our coily hairstyle guide for protective styles built around tighter curl patterns.
23. Pull-Through Braid
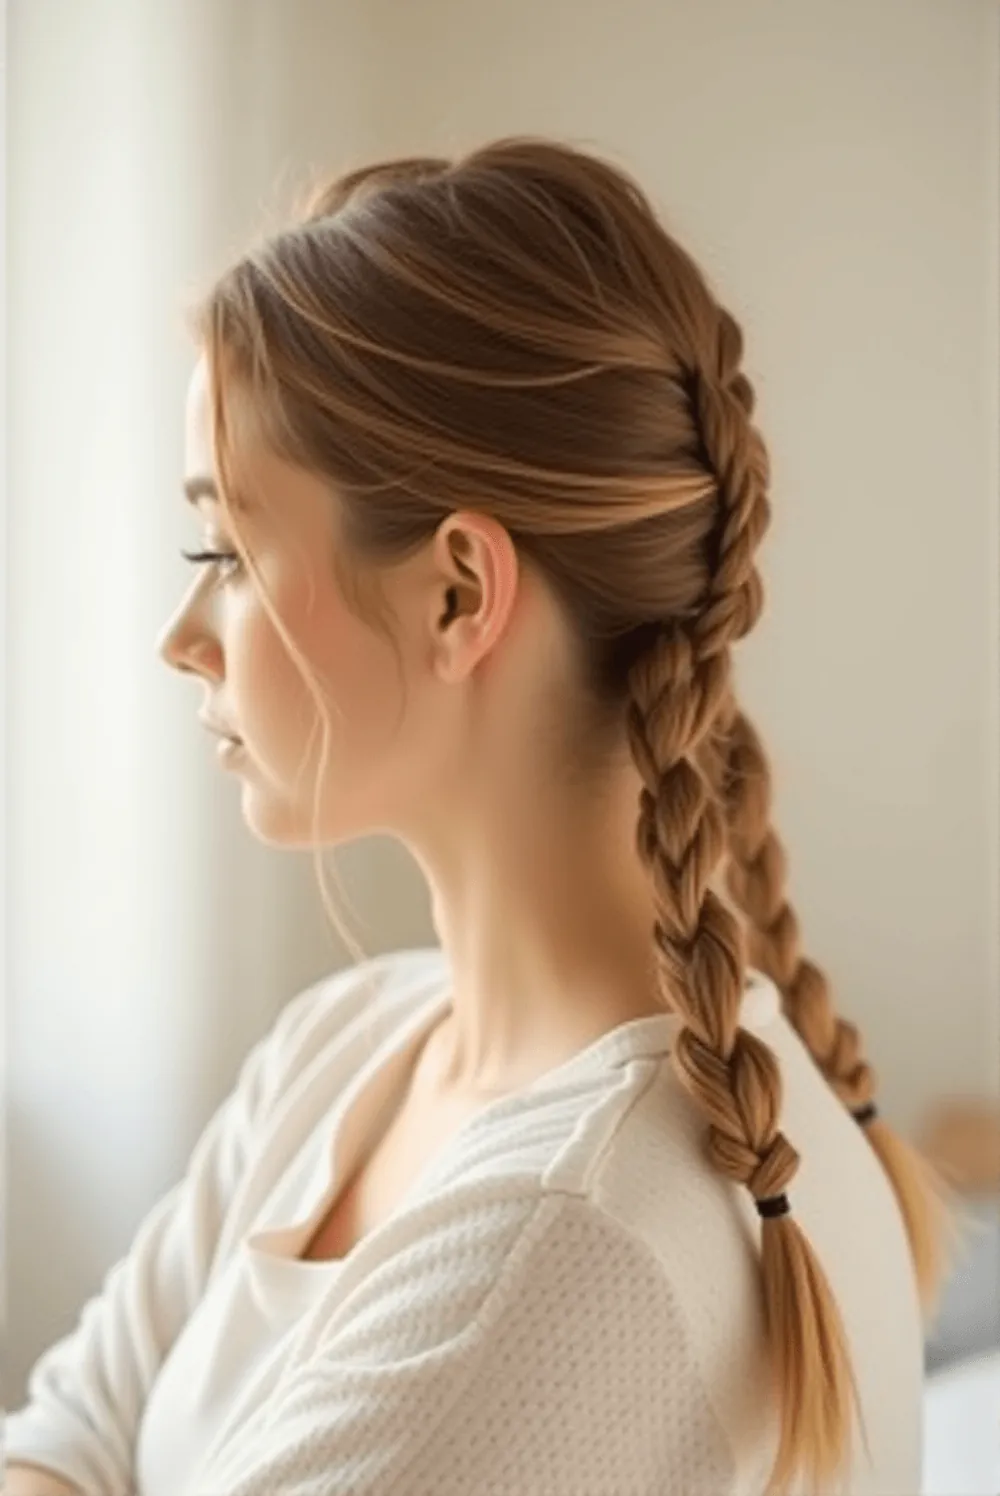
Another illusion braid, built the same looping way as the infinity style but with wider sections pulled through for a chunkier finish. From a few feet away it reads as a fishtail, though the technique underneath has nothing to do with actual weaving.
Good to Know: This is often the easiest braid for beginners to learn first, since there’s no over-under motion to memorise, just loop and pull.
24. Braided Top Knot
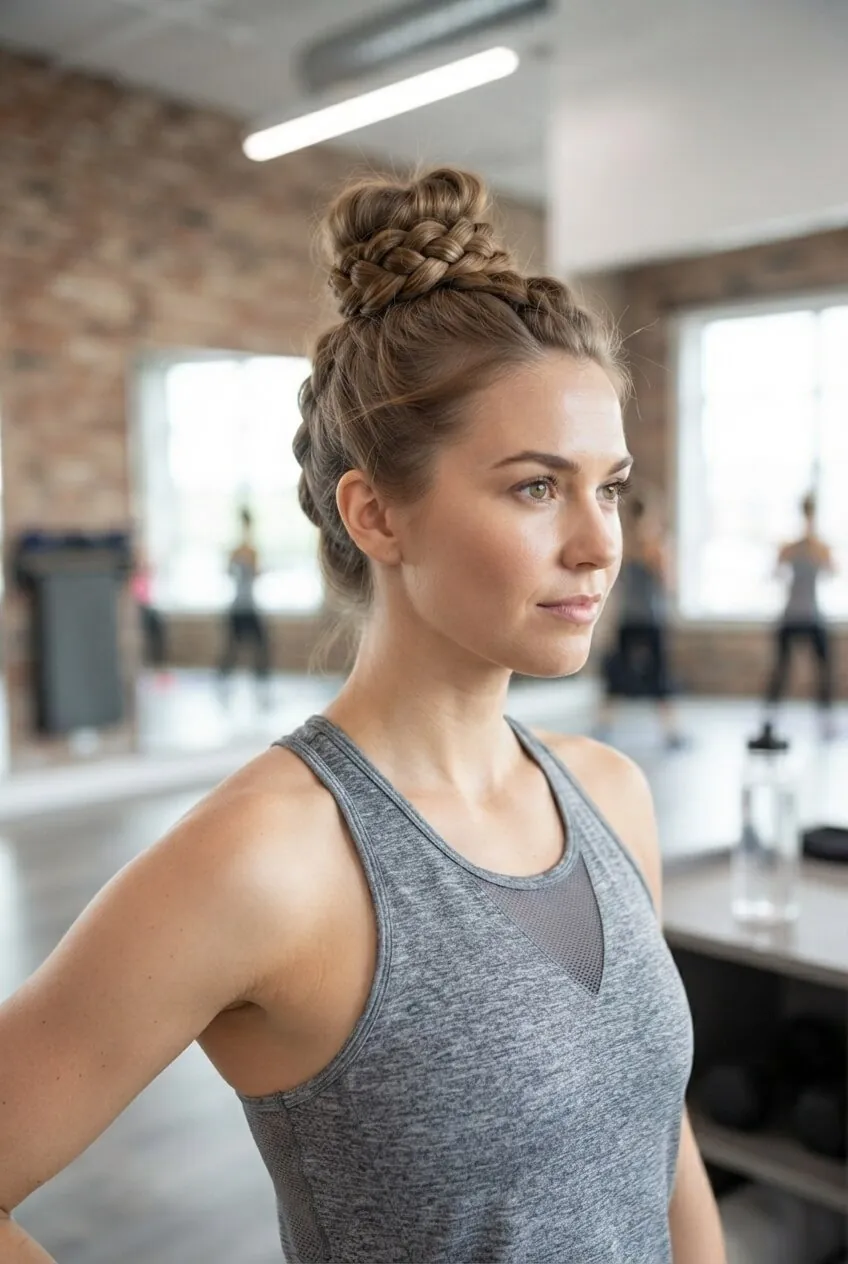
A high bun gets more texture when it starts as a braid instead of a plain twist. The braid winds around the base of the knot rather than sitting flat, so even a simple high-bun day ends up looking more finished.
Step 1: Make a high ponytail with your hair.
Step 2: Braid the ponytail down its length.
Step 3:Pin the wrapped braid around the base.
25. Gym-Ready Braided Ponytail
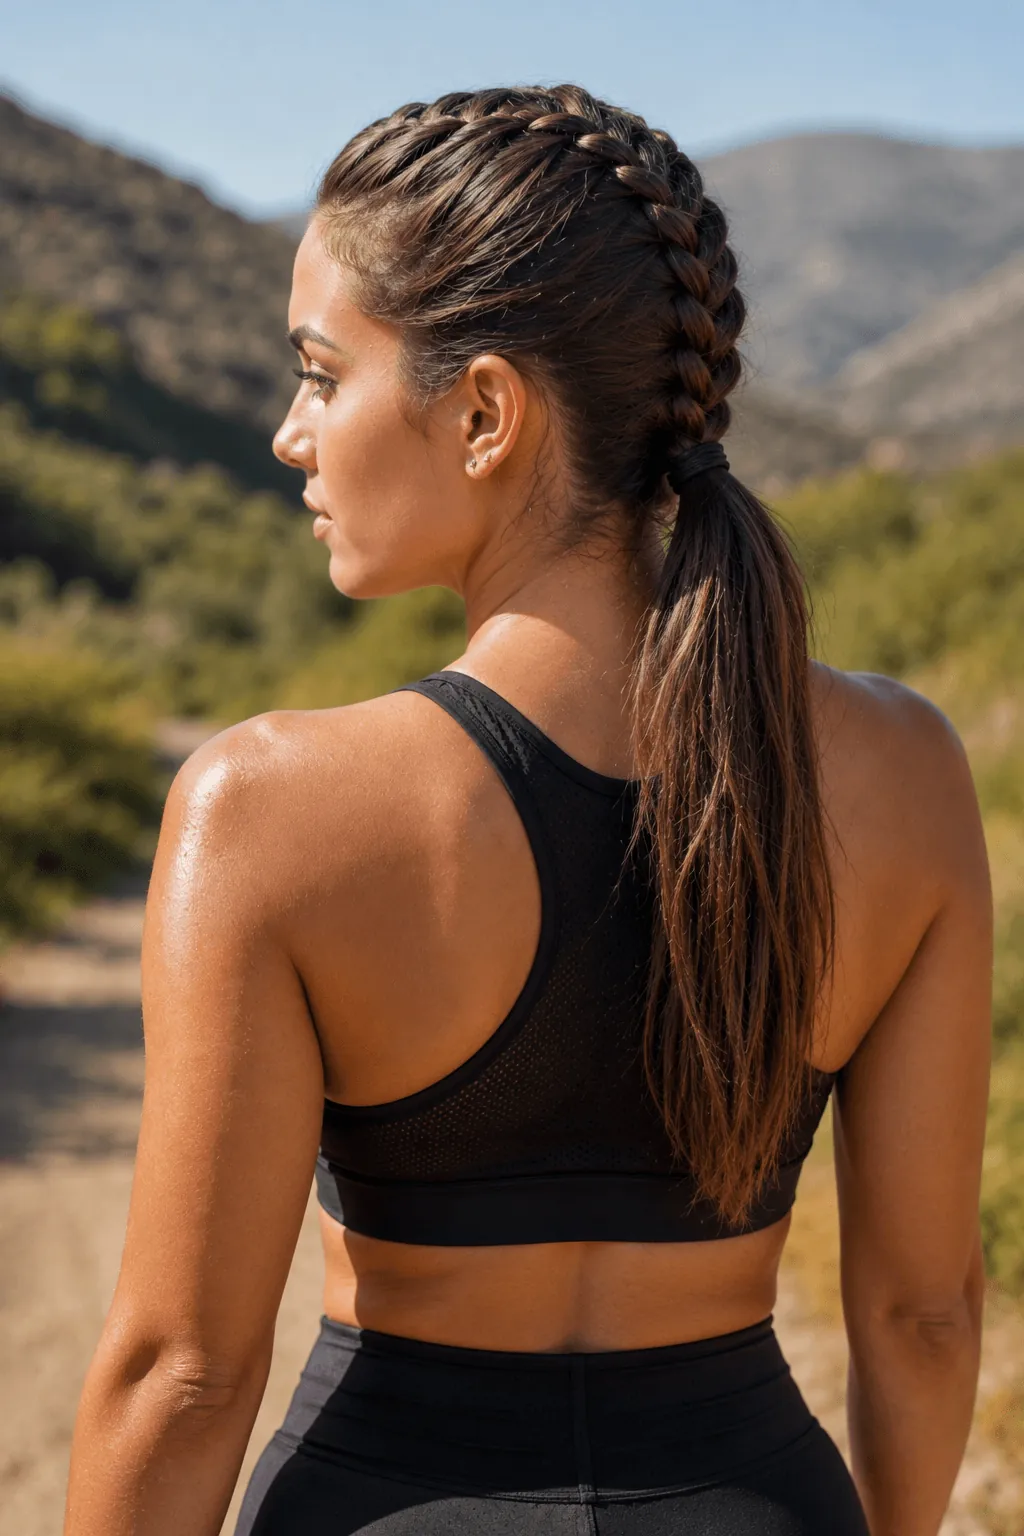
This hairstyle involves starting off with one tight braid from the crown that goes straight down to a low, secure ponytail. The braid will ensure that the hair is kept away from your neck and face as the ponytail takes care of the rest.
Best for: Running or any other exercises that will cause you to sweat and move around in less than ten minutes.
Conclusion
Twenty five ideas is plenty to work with, and it really just comes down to how much time you’ve got that morning. Grab a rope braid if you’re rushing, five minutes and done. Go knotless if you want weeks off from touching a comb at all. The rest fall in between, some for a wedding, some for the gym, some for a Tuesday that needed a bit more happening.
Save whatever caught your eye. Mixing techniques works too, French on top with loose waves underneath holds up fine. Pin your favorites before the next hair day sneaks up.